Note: This guide has been written for vCloud Automation Center 6.0 (vCAC 6.0) using the following software builds:
VMware-vCenter-Server-Appliance-5.5.0.5100-1312297_OVF10.ova
VMware-VMvisor-Installer-5.5.0-1331820.x86_64.iso
VMware-Identity-Appliance-2.0.0.0-1445146_OVF10.ova
VMware-vCAC-Appliance-6.0.0.0-1445145_OVF10.ova
Configuring the vCloud Automation Center 6.0 (vCAC 6.0) Identity Appliance
-
Login to https://yourvcacidva.fqdn:5480
-
Navigate past the untrusted certificate.
-
Enter root as the username, and the password you defined during the OVA deployment.

-
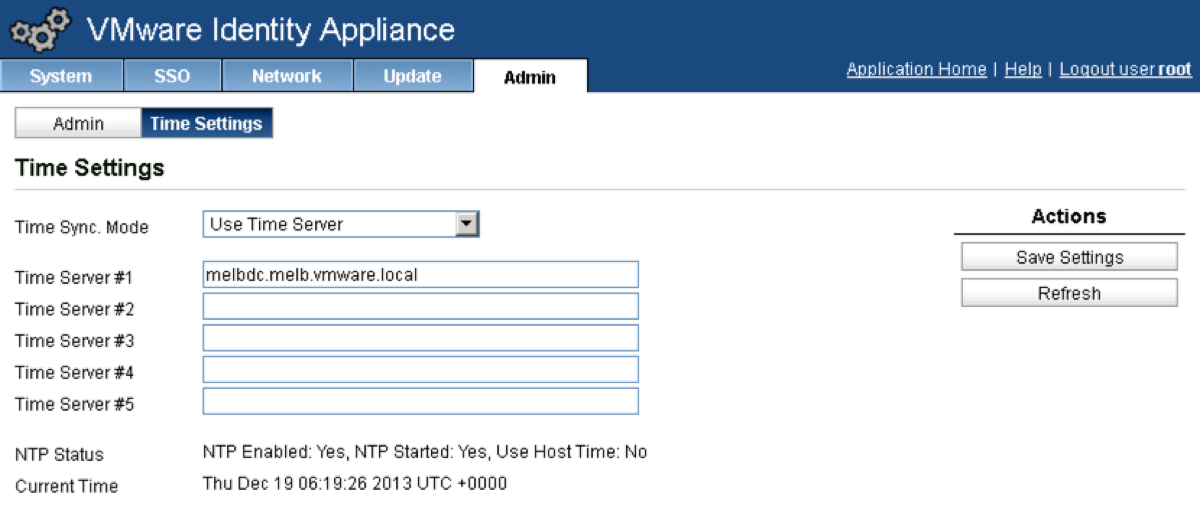
Go to the Admin tab and click on Time Settings.
-
Change the Time Sync Mode drop down box to “Use Time Server”.
-
Define your time server(s), remembering that your (soon to be built) IaaS Windows Server will need to be in sync too.
-
Click Save Settings.
-
Click on the Network tab, and confirm that your Hostname, Default Gateway, IP Address and DNS Server settings are correct.
-
Click on the SSO tab.
-
Enter and then re-enter a password to be used by the administrator@vsphere.local account and click the apply button.
-
Go get a coffee, beer or other beverage and come back in about three minutes.
-
You should now see “SSO is initialized” in green under “SSO Configuration” and also “SSO Status RUNNING” under the password fields.

-
Click on the Host Settings tab.
-
in the SSO Host Name field, append :7444 to the end of your vCACID VA FQDN and click Apply.

Note: If you only have the hostname in this field and not the FQDN, change it to the FQDN. This will make life with SSL certificates much easier.
- Click on the SSL tab.
Note: This post will take you through the process for generating self signed certificates. If you want to use CA signed certificates, please go to this post.
-
Change the “Choose Option” drop down to “Generate Self Signed Certificate”.
-
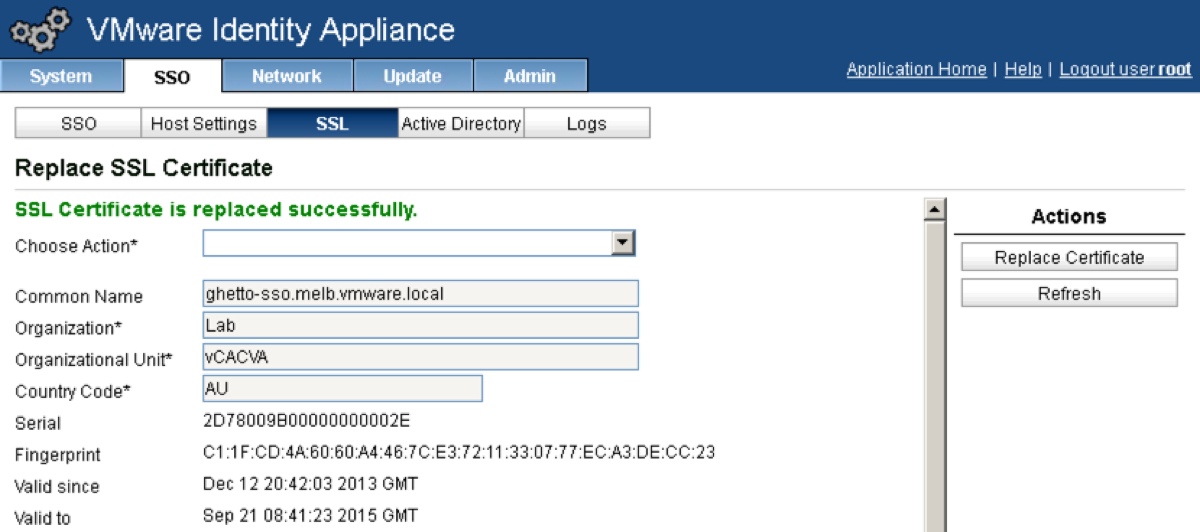
Enter the FQDN of your vCAC Identity Appliance in the Common Name field.
_Note: Ignore the canonical name format that is auto generated. This is leading you down the garden path. As stated above, enter the FQDN of your appliance. This is basically a GUI for a CSR so treat the fields in that way.
_
-
Enter an Organization value in the Organization field.
-
Enter and Organization Unit value in the Organization Unit field.
-
Enter a two digit Country Code in the Country Code field.
-
Click the Replace Certificate button.
-
You should now see “SSL Certificate Replaced Successfully” in green under “Replace SSL Certificate”.
 _
_
Note: do not try to replace the certificate with the same process after a successful certificate generation. This will hose your Identity Appliance._
-
Click on the Active Directory tab.
-
Enter a Domain Name, Domain User (no domain detail required) and Password then click on Join AD Domain.
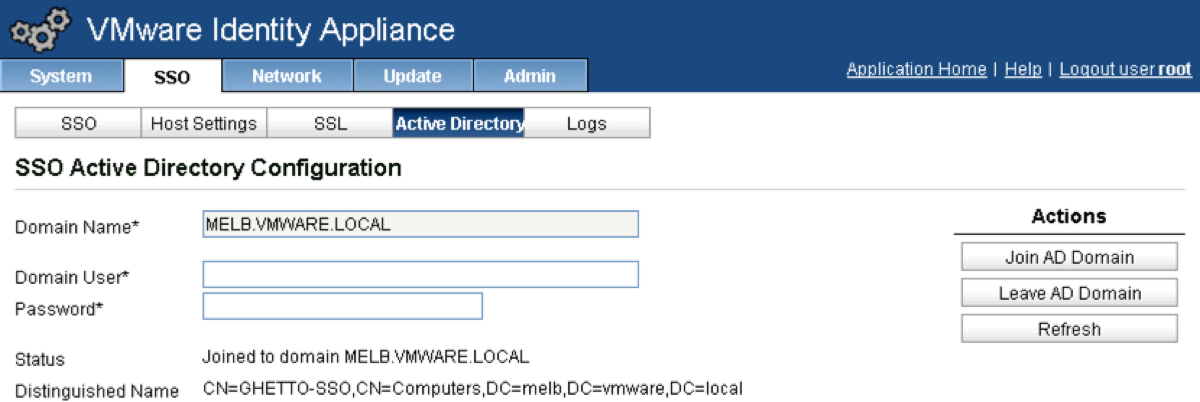
- You are now able to use Native AD as a connection method when defining vCAC Identity Sources.
_Note: This also enables people to login to the VAMI using their domain credentials. Appropriate steps to prevent domain users from doing this should be taken.
_
- Initial setup of the vCAC Identity Appliance is complete.
Configuring the vCloud Automation Center 6.0 (vCAC 6.0) Virtual Appliance
-
Login to https://yourvcacva.fqdn:5480
-
Navigate past the untrusted certificate.
-
Enter root as the username, and the password you defined during the OVA deployment.

-
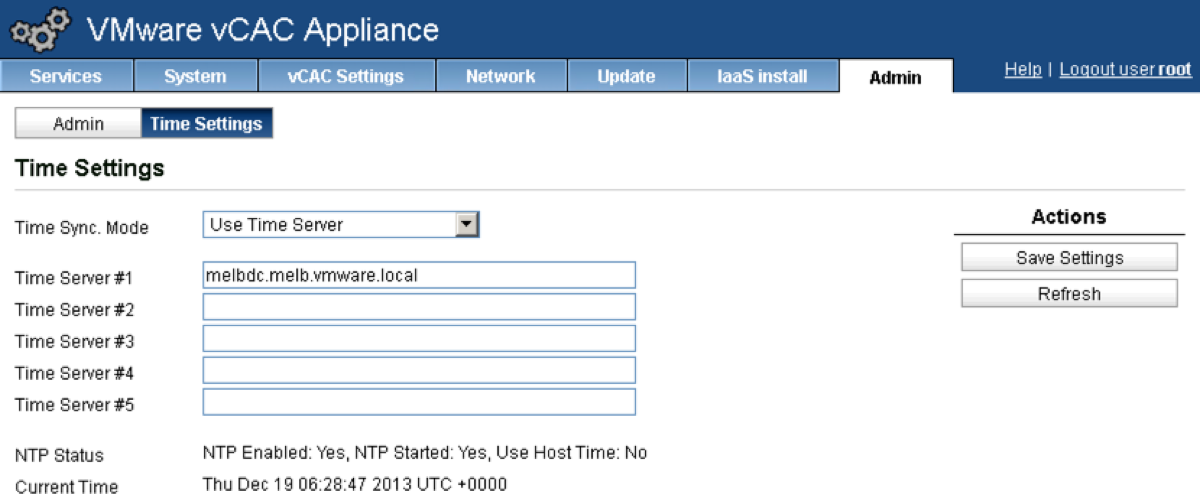
Go to the Admin tab and click on Time Settings.
-
Change the Time Sync Mode drop down box to “Use Time Server”.
-
Define your time server(s), remembering that your (soon to be built) IaaS Windows Server will need to be in sync too.
-
Click Save Settings.
-
Click on the Network tab, and confirm that your Hostname, Default Gateway, IP Address and DNS Server settings are correct.
-
Click on the vCAC Settings tab.
-
Click on the “Resolve Host Name” button. Once this populates with your FQDN, click on the Save Settings button.

11. Click on the SSL tab.
Note: This post will take you through the process for generating self signed certificates. If you want to use CA signed certificates, please go to this post.
-
Change the “Choose Option” drop down to “Generate Self Signed Certificate”.
-
Enter the FQDN of your vCAC Identity Appliance in the Common Name field._
_
-
Enter an Organization value in the Organization field.
-
Enter and Organization Unit value in the Organization Unit field.
-
Enter a two digit Country Code in the Country Code field.
-
Click the Replace Certificate button.
-
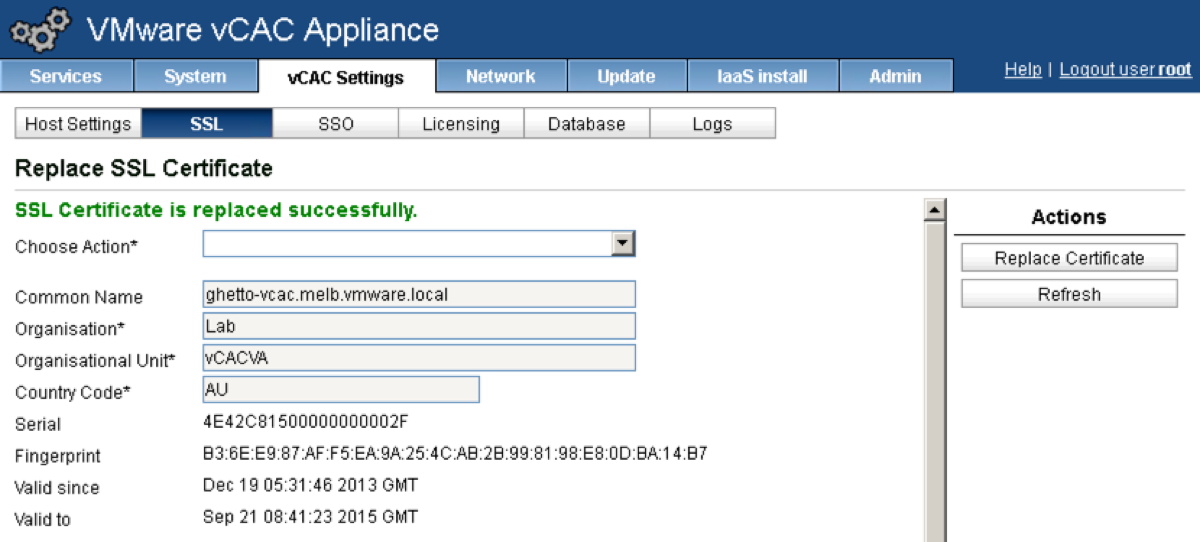
You should now see “SSL Certificate Replaced Successfully” in green under “Replace SSL Certificate”.
-
Click on the SSO tab.
-
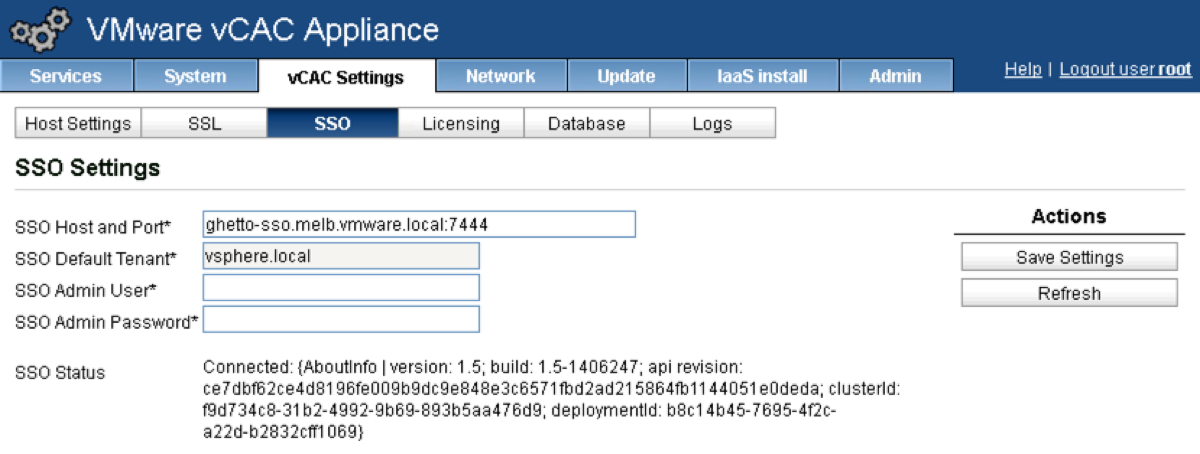
Enter the FQDN of your vCAC Identity VA followed by :7444
-
Enter administrator@vsphere.local in the SSO Admin field.
-
Enter the password you defined during Step 10 of Configuring the vCAC Identity Appliance above.
-
Click the “Save Settings” button.
-
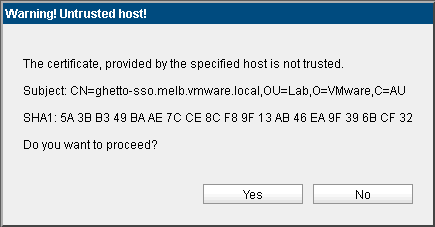
Regardless of whether you are using self signed certs or not, you will likely see the following message (unless you’re trusting the root CA already):
-
Click “Yes” on the dialog shown above.
-
Wait for around five minutes. A good time for another coffee.
-
You should see SSO configuration is updated successfully in green writing underneath SSO Settings (this is not shown in the screenshot above).
-
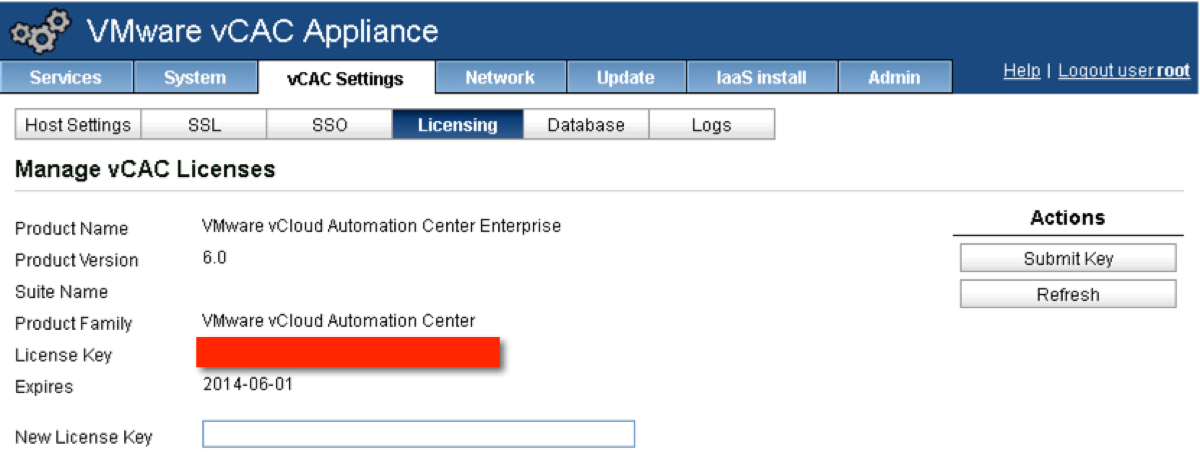
Click on the Licensing tab, and enter your vCAC Licence Key.
-
Click Submit Key.
30. Initial setup of the vCAC Appliance is complete.
