Replacing the self signed certificates for vCAC it not a particularly difficult process, just a tedious one. In this post we’ll take a look at what you need to do to update the certificates on your vCAC IaaS server.
Assumptions:
-
You have OpenSSL installed and configured on your system
-
You are using a Microsoft CA; and
-
You have configured a Template Authority with the appropriate extensions.
Generating the Certificate Requests
To generate the appropriate configuration files:
-
Open a text editor on the system where OpenSSL is installed.
-
Paste the following text into a file, replacing the information in red with that specific to your environment.
[ req ]
default_bits = 2048
default_keyfile = rui.key
distinguished_name = req_distinguished_name
encrypt_key = no
prompt = no
string_mask = nombstr
req_extensions = v3_req
[ v3_req ]
basicConstraints = CA:FALSE
keyUsage = digitalSignature, keyEncipherment, dataEncipherment, nonRepudiation
extendedKeyUsage = serverAuth, clientAuth
subjectAltName = DNS:ghetto-iaas, IP:172.16.103.113, DNS:ghetto-iaas.melb.vmware.local
[ req_distinguished_name ]
countryName = AU
stateOrProvinceName = VIC
localityName = Melbourne
0.organizationName = Lab
organizationalUnitName = vCACIaaS
commonName = ghetto-iaas.melb.vmware.local
-
Save the file as vcaciaas.cfg but do not close it (I have saved my file in h:\certs\vcaciaas as you’ll note further on).
-
To create the vCAC VA config file, update the fields in red with the appropriate information and save as vcacva.cfg (I have saved my file in h:\certs\vcacva as you’ll note further on).
Next, generate the certificate request and corresponding key for the certificate.
To generate the certificate request:
-
Launch a command prompt and navigate to your OpenSSL directory. By default this is located in c:\OpenSSL-Win32\bin
-
Run the following commands (replacing the path with your desired location) to create the certificate request and export the private key:
openssl req -new -nodes -out h:\certs\vcaciaas\rui.csr -keyout h:\certs\vcaciaas\rui-orig.key -config h:\certs\vcaciaas\vcaciaas.cfg
- Convert the key to the appropriate RSA format required by the appliances:
openssl rsa -in h:\certs\vcaciaas\rui-orig.key -out h:\certs\vcaciaas\rui.key
Getting the Certificate
-
Logon to the Microsoft CA Web Interface (https://ca-server/CertSrv)
-
Click on the Request Certificate > Advanced Certificate Request
-
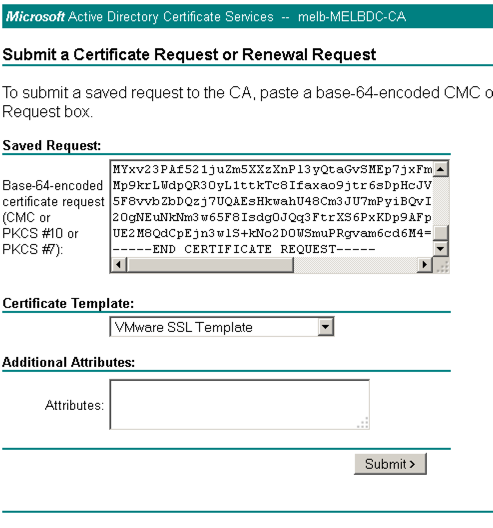
Open the rui.csr file for the vCAC IaaS Server and then copy and paste the contents into the Base-64-encoded certificate request field.
-
Ensure you select the correctly configured Certificate Template.
-
Click “Submit” to submit the request.
-
Select the “Base64 encoded” option on the Certificate Issued screen.
-
Click the “Download Certificate” link and save as rui.crt in the same location as your config file and CSR.
-
Navigate back to the homepage of the certificate server and click “Download a CA certificate, certificate chain or CRL”.
-
Select the “Base64 encoded” option.
-
Click the “Download a CA Certificate Chain” link.
-
Save the certificate chain as cachain.p7b in your desired location.
-
Double click the cachain.p7b file and navigate to yourlocation\cachain.p7b > Certificates
-
Right click the root certificate and select “All Actions > Export” and then click Next.
-
Select Base64-encoded X.509 (.CER) and click Next.
-
Save the export to _your location/_Root64.cer and click Next.
Converting the Certificates to PFX Format
-
Launch a command prompt and navigate to your OpenSSL directory. By default this is located in c:\OpenSSL-Win32\bin
-
Run the following commands (replacing the path with your desired location) to convert the certificates to the format expected of the vCAC IaaS Server.
openssl pkcs12 -export -in h:\certs\vcaciaas\rui.crt -inkey h:\certs\vcaciaas\rui.key -certfile h:\certs\Root64.cer -name “rui” -passout pass:testpassword -out h:\certs\vcaciaas\rui.pfx
Applying the Certificate to the vCAC IaaS Site
-
Login to your vCAC IaaS Server
-
Open the IIS Manager console.
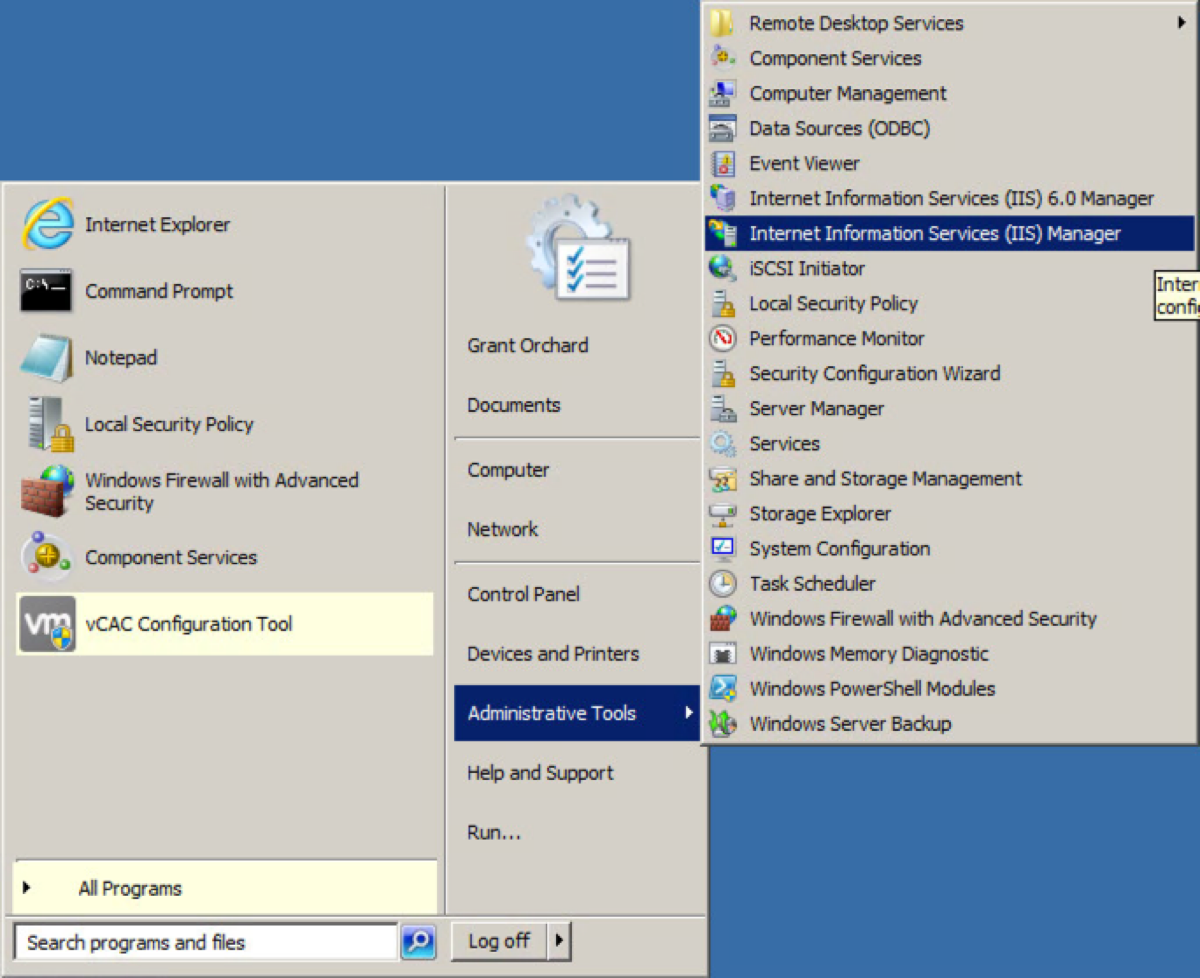
- Navigate to your Server instance, and open Server Certificates.
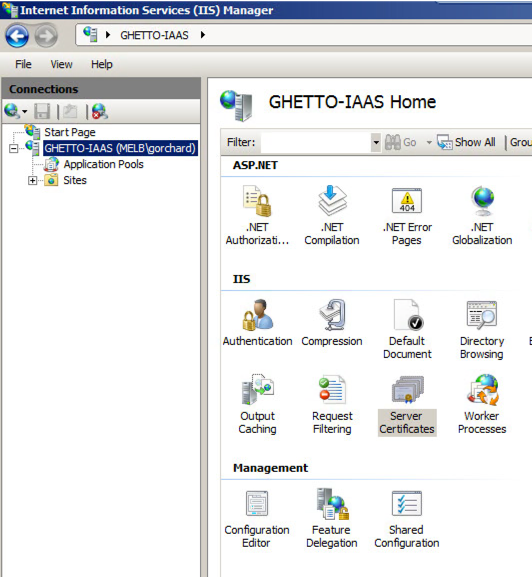
- Select “Import” in the top right hand corner.

- Browse to the PFX file created in the section above, enter the password (in my example testpassword) and click OK.
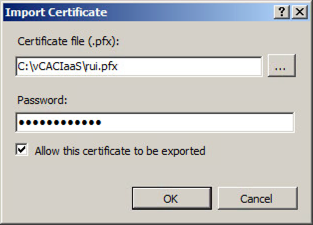
You should now see the imported certificate in your list (if you want it to appear more friendly then change the name from rui.pfx to something more friendly).

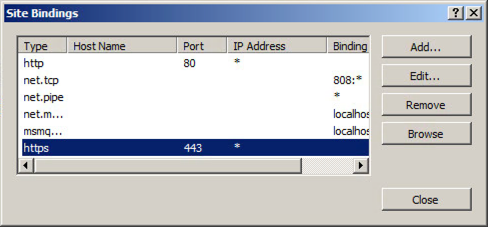
- Navigate to your Default Web Site (the vCAC website) and select “Bindings”.

- Select “https” and click “Edit”.
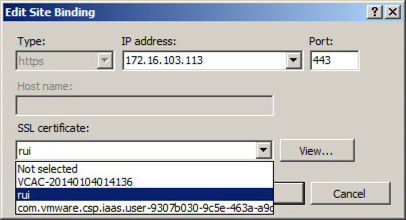
- Click the SSL Certificate drop down and select your certificate, then click OK.
Register the new Certificate with the vCAC Appliance
- Browse to c:\Program Files (x86)\VMware\vCAC\Server\Model Manager Data\cafe
Note: CAFE stands for Cloud Automation Framework Extensibility. Just in case you were wondering.
- Register the new certificates on your IaaS Server to the vCAC Appliance with the following set of commands:
vcac-config RegisterEndpoint --EndpointAddress https://ghetto-iaas.melb.vmware.local/vcac --Endpoint ui -v
vcac-config RegisterEndpoint --EndpointAddress https://ghetto-iaas.melb.vmware.local/vcac/SslCallback.aspx  --Endpoint ssl -v
vcac-config RegisterEndpoint --EndpointAddress https://ghetto-iaas.melb.vmware.local/Repository --Endpoint repo -v
vcac-config RegisterEndpoint --EndpointAddress https://ghetto-iaas.melb.vmware.local/WAPI --Endpoint wapi -v
vcac-config RegisterEndpoint --EndpointAddress https://ghetto-iaas.melb.vmware.local/WAPI/api/status --Endpoint status -v
At this point you are good to go, and shouldn’t receive any certificate warnings about your IaaS server.
Thanks to Steve Kaplan for his assistance in putting this post together.
