
I was asked this week about the process for using a SAML provider such as ADFS for authentication in vRA. To start off with, you want to create a new Identity Provider.
- Head to Administration > Directories Management > Identity Providers and click Add Identity Provider. Choose Add Third Party IdP.
- Don’t configure anything at this point, just scroll right to the bottom and click the Service Provider (SP) Metadata link. It should be similar to https://vra.lab.local/SAAS/t/vsphere.local/API/1.0/GET/metadata/sp.xml though obviously it will have your appliance/load balancer FQDN.
The xml that appears in the webpage is what we need to setup your vRA instance as a relying party.
Note: While you can pass the link to the XML for both vRA and ADFS, that process relies on having PKI setup correctly in your environment. If the certificates aren’t trusted then the process will fail. In this case it is easier to copy and paste the XML to a file which can be imported.
- Navigate to your ADFS server, and launch the MMC plugin for ADFS. Expand out the navigation tree, and right click the Relying Party Trusts key. Select Add Relying Trust Party, and navigate through the wizard. The one setting that you need to configure is under Select Data Source, and you provide either the URL, or a file with the XML data. Leave everything else as default (including the check box to open the claim rules dialog at the end) and then click Close.
- Next up, claim rules. We’re going to use two - one to extract the SAM from AD, and one to transform it for our purposes.
Rule 1
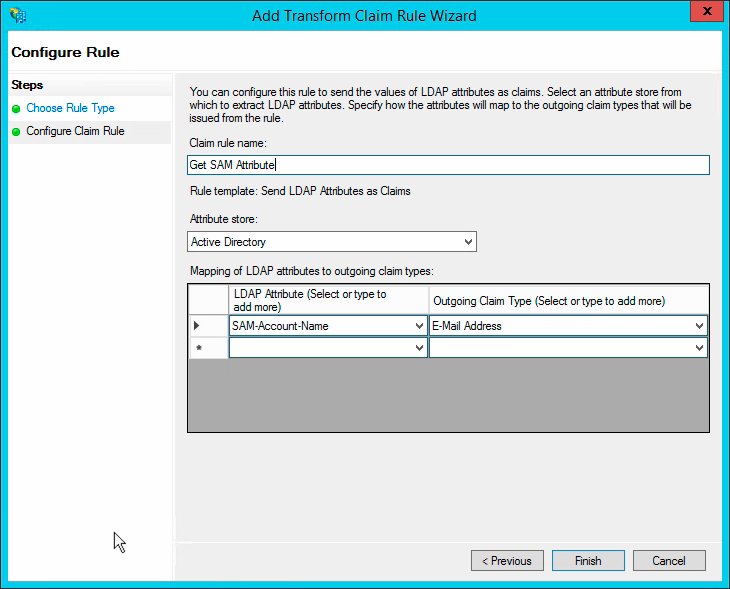
- Click Add Rule, and use the Send LDAP Attributes as Claims template.
Call the claim rule Get SAM Attribute.
Change the Attribute store to Active Directory.
Click the LDAP Attribute dropdown and change it to SAM-Account-Name.
Click the Outgoing Claim Type dropdown and set it to E-Mail Address.
Click Finish.
Rule 2
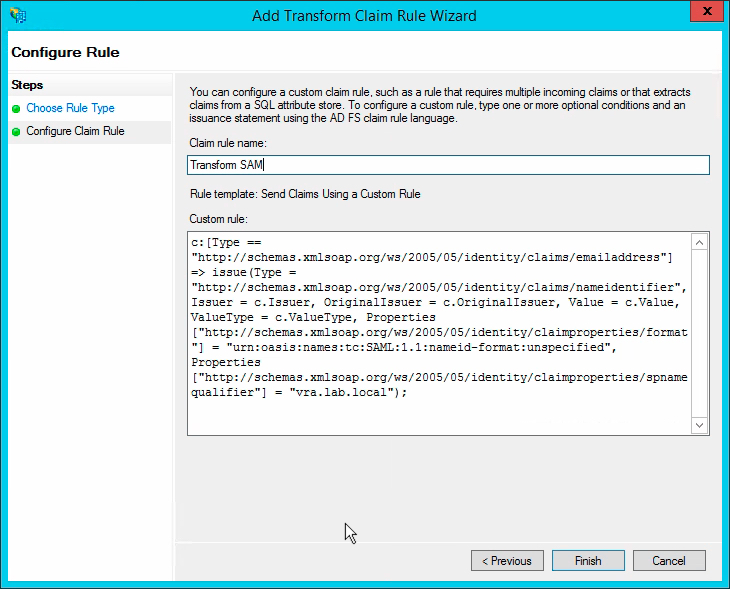
Click Add Rule, and use the Send Claims Using a Custom Rule template.
Call the claim rule Transform SAM.
Paste the following text into the custom rule field:
c:[Type == "http://schemas.xmlsoap.org/ws/2005/05/identity/claims/emailaddress"]
 => issue(Type = "http://schemas.xmlsoap.org/ws/2005/05/identity/claims/nameidentifier", Issuer = c.Issuer, OriginalIssuer = c.OriginalIssuer, Value = c.Value, ValueType = c.ValueType, Properties["http://schemas.xmlsoap.org/ws/2005/05/identity/claimproperties/format"] = "urn:oasis:names:tc:SAML:1.1:nameid-format:unspecified", Properties["http://schemas.xmlsoap.org/ws/2005/05/identity/claimproperties/spnamequalifier"] = "vra.lab.local");
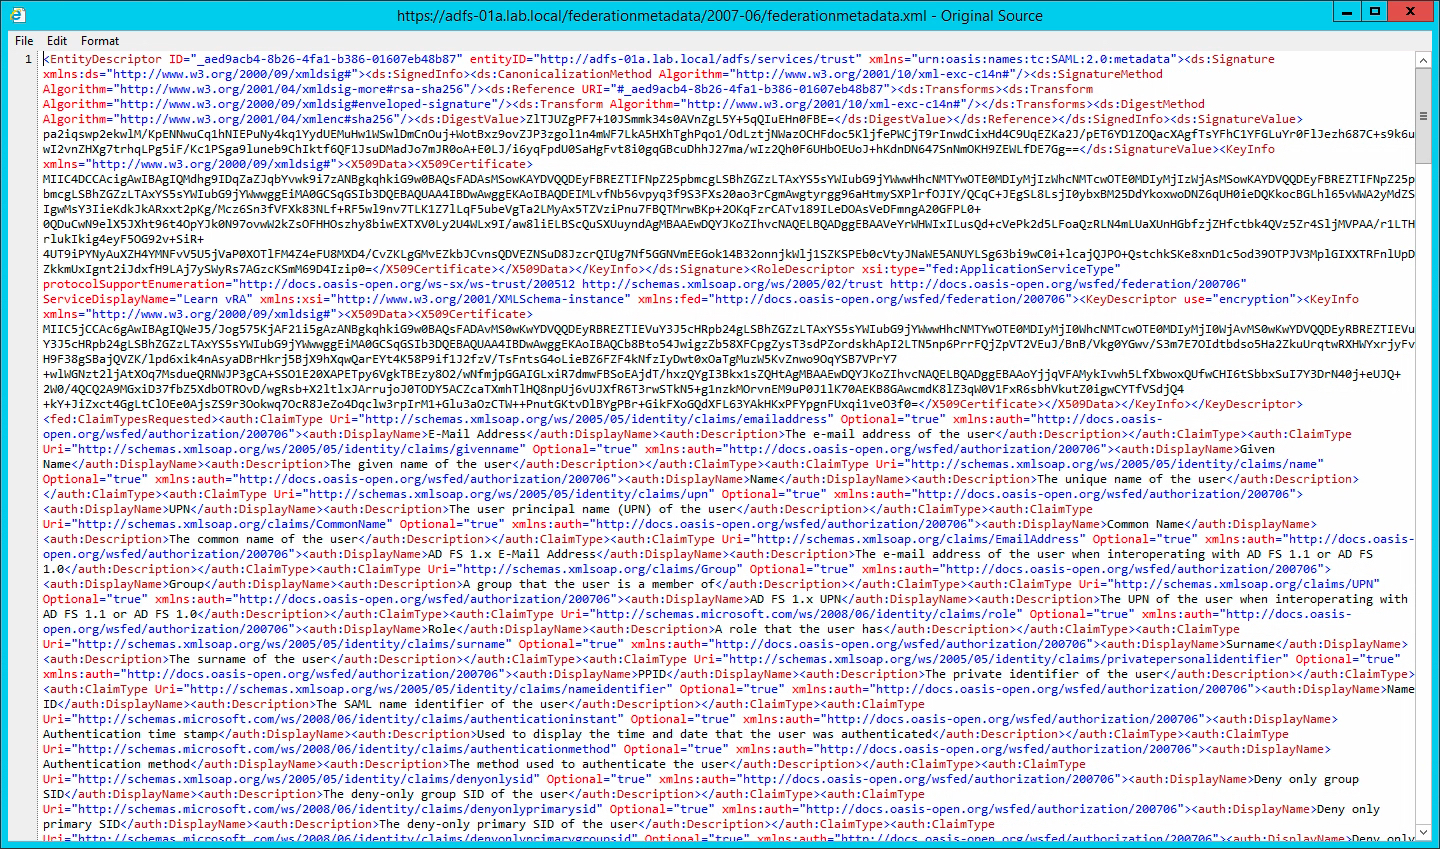
- With that done, it’s time to grab the xml metadata from ADFS to provide to vRA. Navigate to https://adfs-01a.lab.local/federationmetadata/2007-06/federationmetadata.xml substituting your ADFS FQDN/loadbalancer. Depending on the browser that you use, this may render the XML without tags – this is no good for us. If this happens then right click the page and select View Source. Copy this text to the clipboard.
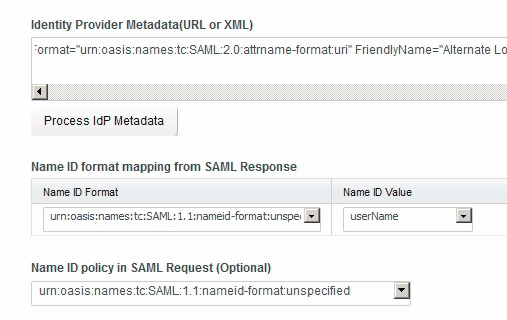
- Head back to vRA, where you should still see the IdP configuration page. Paste the XML into the Identity Provider Metadata field and click the Process IdP Metadata button. Per the image below, you will get three format mapping options appear.
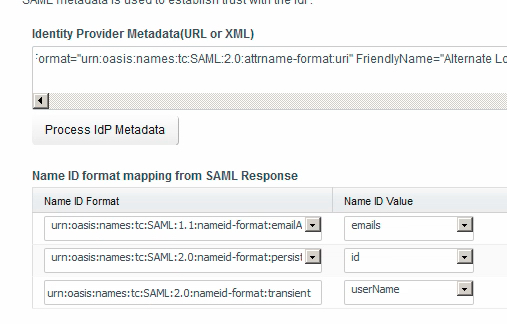
Change the format mapping options to appear as configured in the following image, and the set the Name ID policy as shows also.
Finally, choose the directories and network ranges that can make use of this IdP, and then set the authentication method. Call the method whatever you like (I’ve used ADFS lab.local), and set the SAML Context to urn:oasis:name:tc:SAML:2.0:ac:classes:PasswordProtectedTransport.
Click Save and your IdP is configured.
- The final configuration step is to make sure that users are going to actually use this IdP. To do that, you need to configure your policy.
To validate this, it’s most simple just to edit an existing policy rule - for production I would create a specific rule set.
Edit the default_access_poloicy_set, and find the Policy Rule that applies to Web Browsers. Click on the authentication method to modify it.
Per the screenshot below, select the primary authentication method from the dropdown list, choosing your newly created method. You can set a fallback to password if you want to play it safe. Click OK.
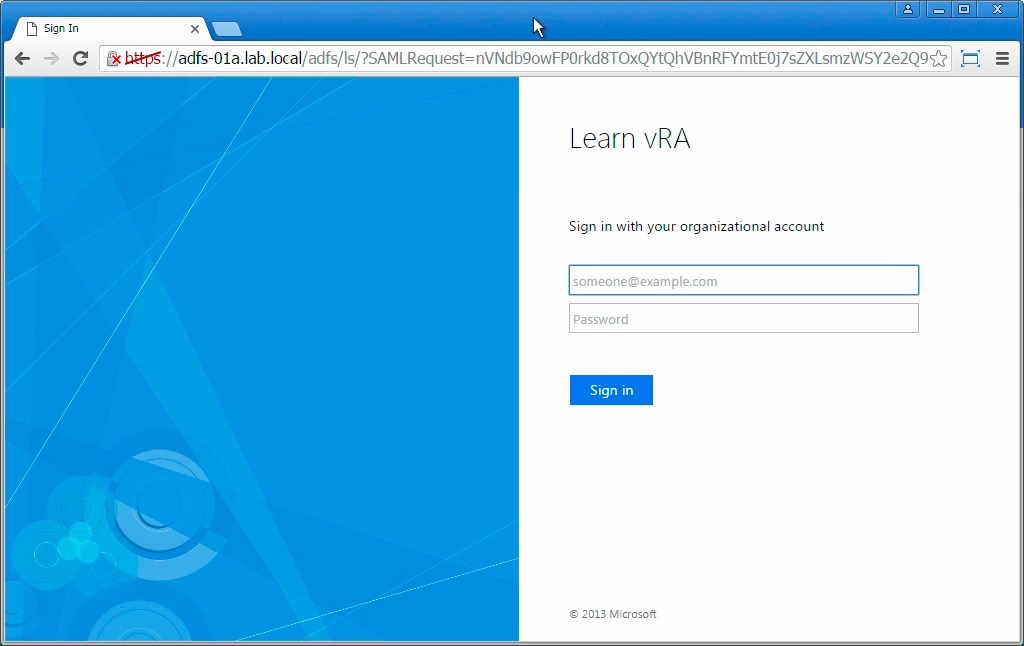
To test this, open up another browser and navigate to your vRA login. You should be redirected to your ADFS screen where you can enter credentials and then be redirected back to vRA.
Good luck!
