This post is going to take you through implementing an external vPostgres database for the vCAC 6.0 Appliance. There are a few situations where you will want to look at doing this, such as deploying a load balanced pair of vCAC Appliances – more on that approach a little later.
One very important thing to note is that once you split out the database function from the vCAC Appliance to a dedicated database server, you can no longer use the bundled vCO Appliance. It needs to be split out as a separate appliance also. I’ll tackle that in a separate post.
Finally, I’d recommend doing this at the very beginning of your deployment. I haven’t actually dug into the process of extracting populated data out of the bundled database, perhaps I should add that to my to do list. At any rate, let’s get down to business.
Note: I’ve put the Virtual Appliance deployment into a toggle bar just to clean things up a little – I assume most people are comfortable with this part but the detailed instructions are still there if you need them – just click on the plus sign.
[bra_toggle collapsable=’yes’ caption=’vPostgres Virtual Appliance Deployment’]
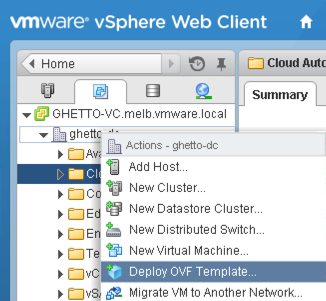
- Login to your Web Client, right click on your Datacenter object and select “Deploy OVF Template”.
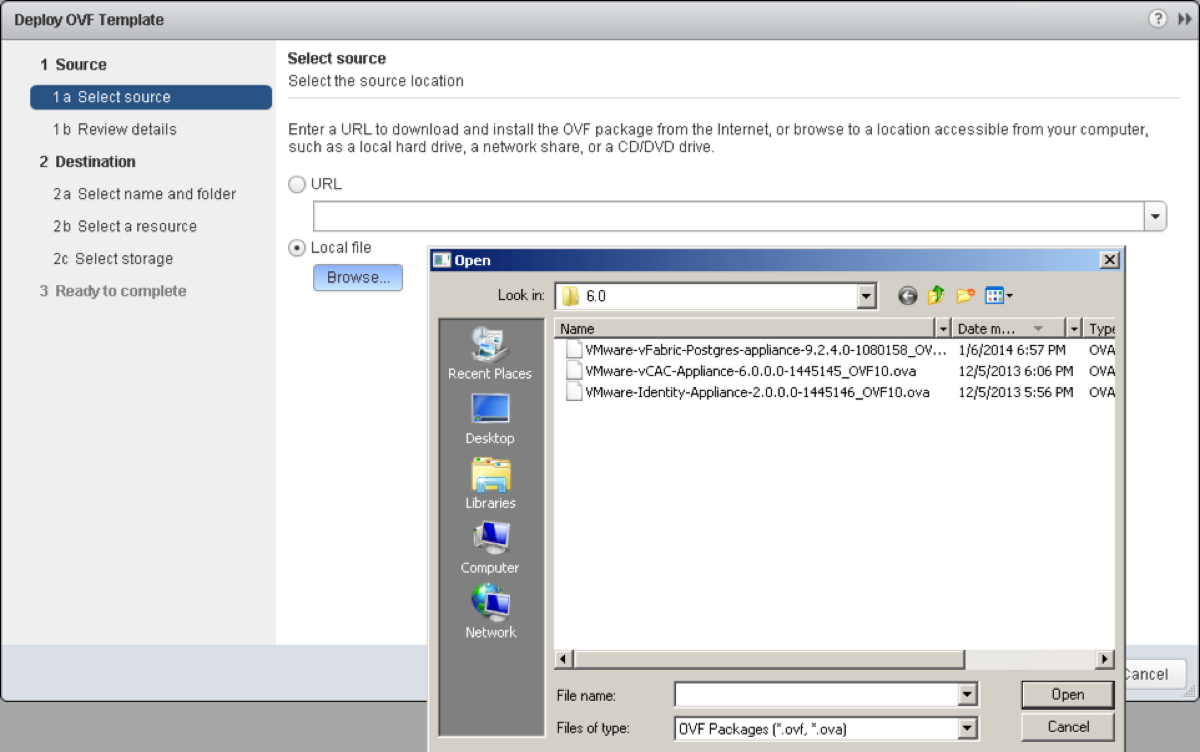
- Click on the “Local File” radio button and click “Browse”. Navigate to the location of your vPostgres Appliance, select it and click “Open”, then click “Next” on the Deploy OVF Template dialogue box.
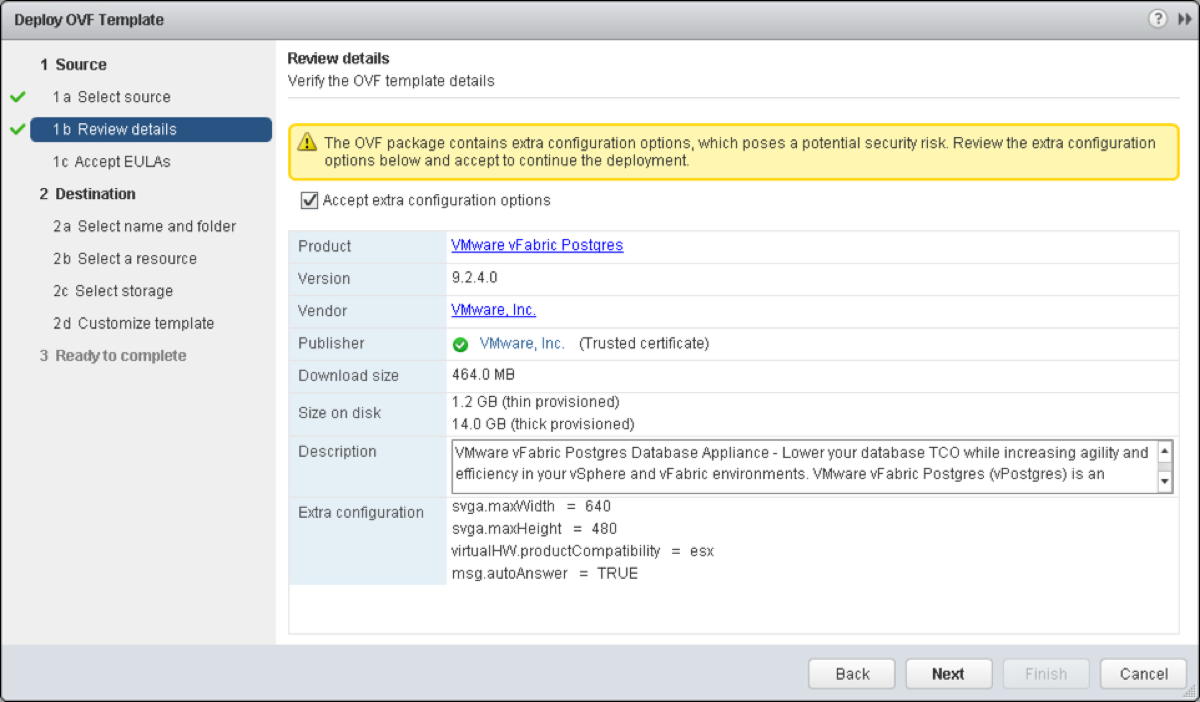
- Click the checkbox to accept the extra configuration options, then click “Next”.
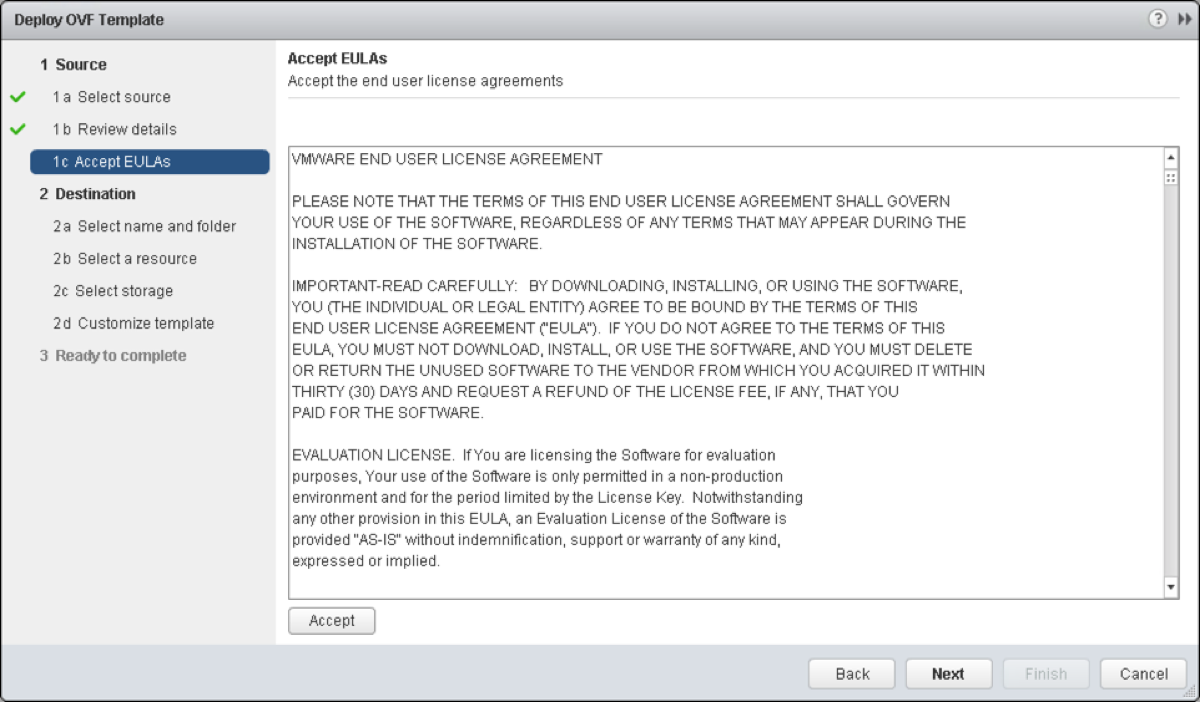
- Click “Accept” to accept the EULA, then click “Next”.
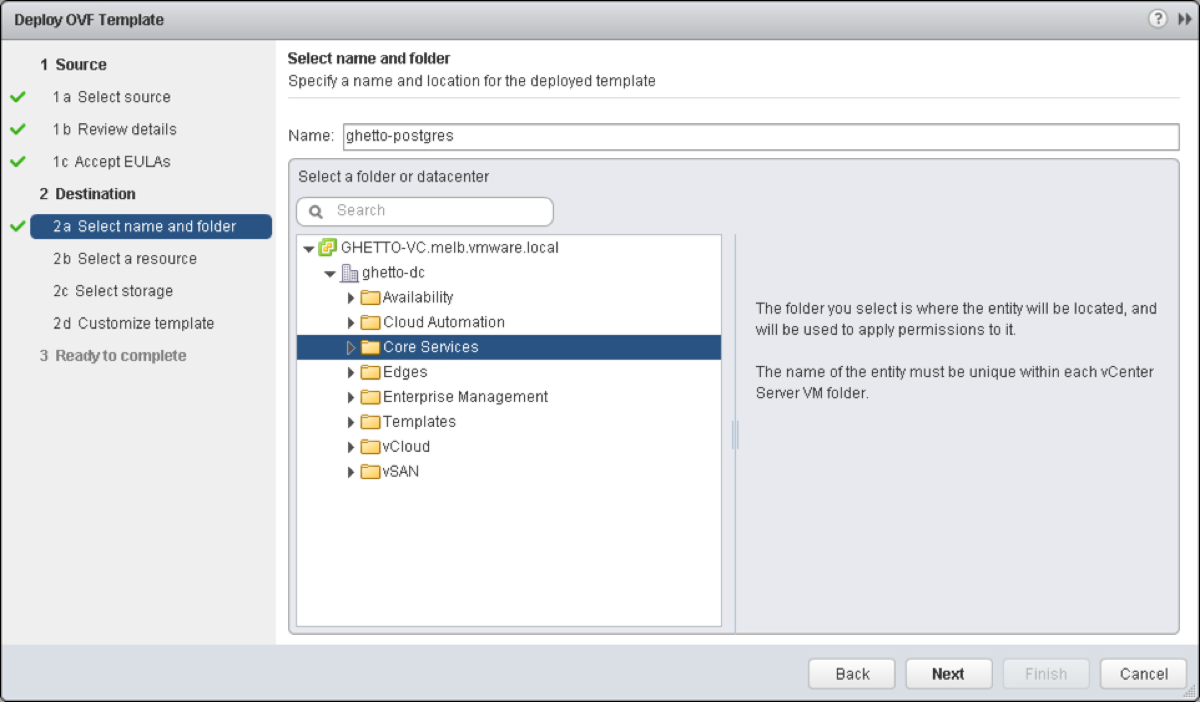
- Enter a name for your VM, and select a folder to place it in then click “Next”.
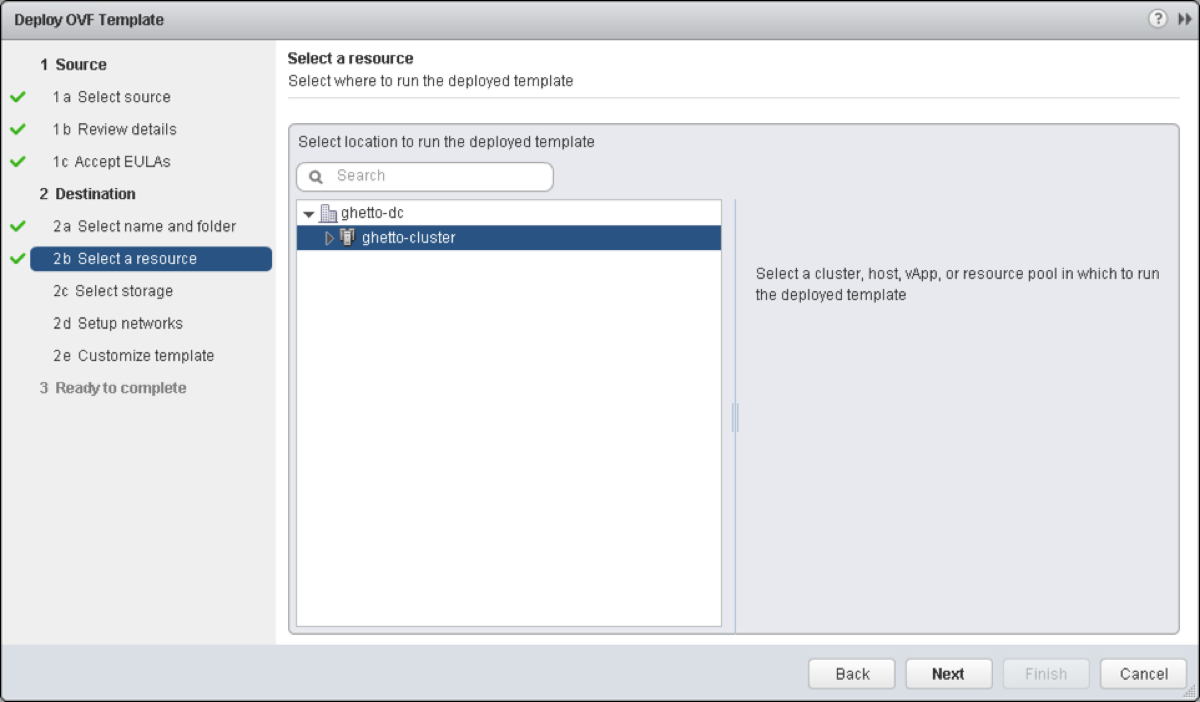
- Select a compute location then click “Next”.
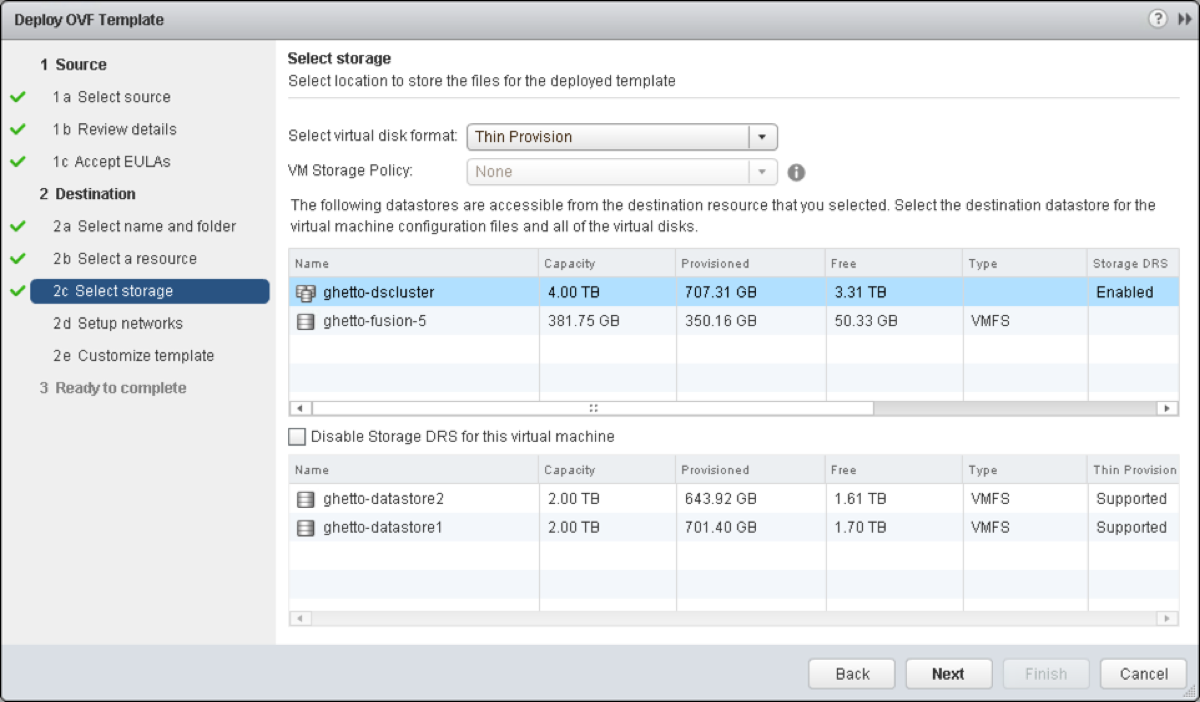
- Select a datastore location and then click “Next”.
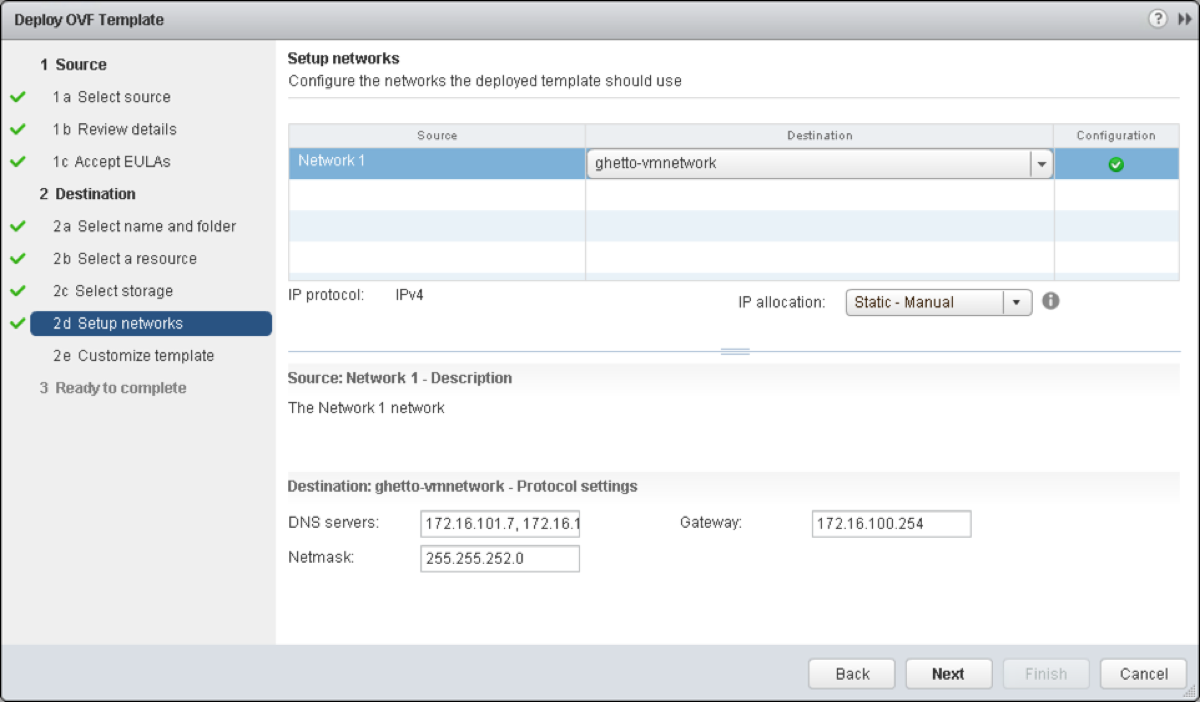
- Select a Portgroup on which to place the VM, and the IP Allocation option (static or DHCP). Click “Next”.
- Enter a password for the root account, and if you selected “Static” as the IP allocation on the previous page define an IP address also. Click “Next”.
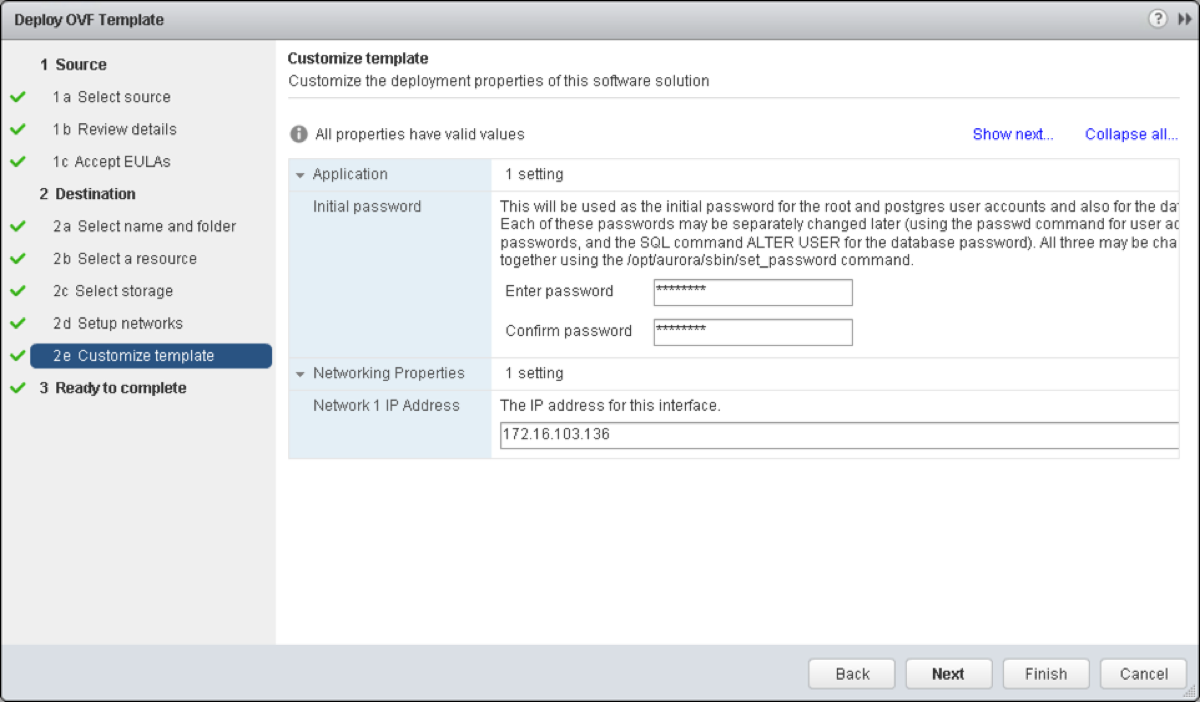
- Finally, click the “Power on after deployment” checkbox and click “Finish”.
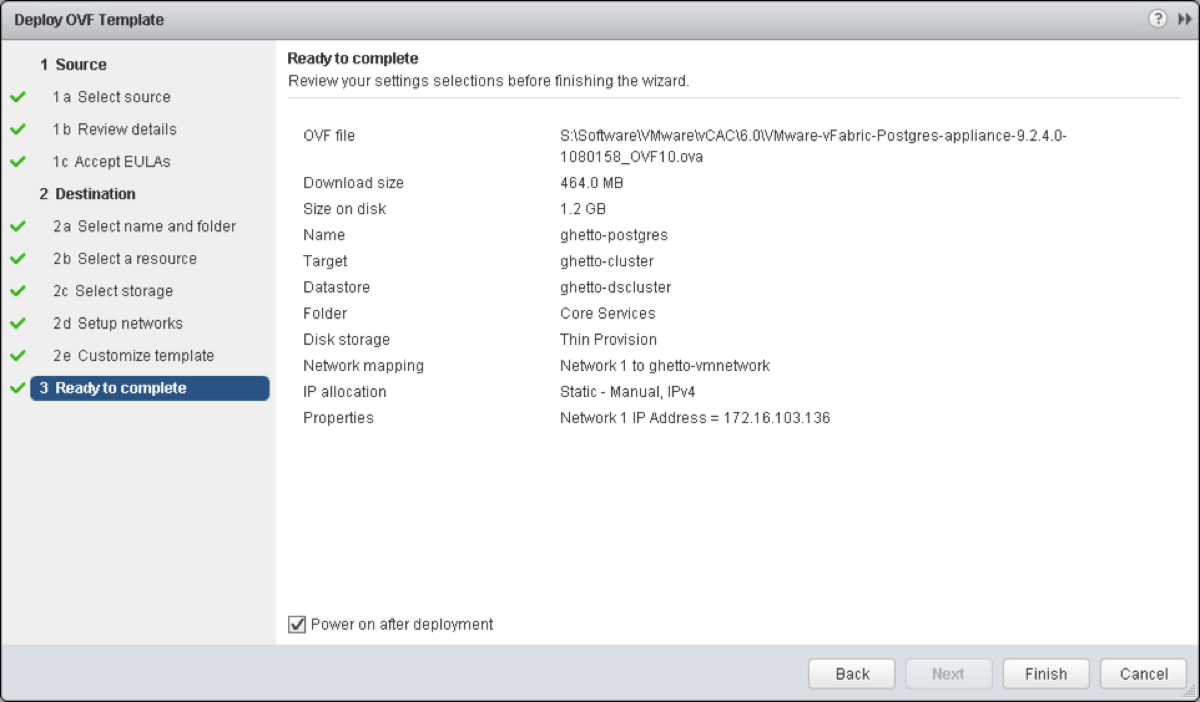
-
While that’s deploying, let’s go update DNS. Login to your DNS server, and launch the DNS Management console.
-
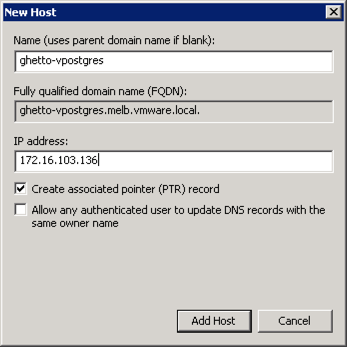
Right click on the appropriate forward lookup zone and select “New Host (A or AAAA)…”

- Enter the desired name of your vPostgres VA and the IP address you defined in step 9, ensure that the “Create associate pointer (PTR) record” is selected then click “Add Host”.
[/bra_toggle]
vPostgres Configuration
-
Open a browser and navigate to https://fqdn.of.your.vpostgres.appliance:5480 and login as root with the password you defined during the vPostgres appliance deployment. You will need to navigate past the untrusted certificate page (unless you’ve already replaced the certificates of course).
-
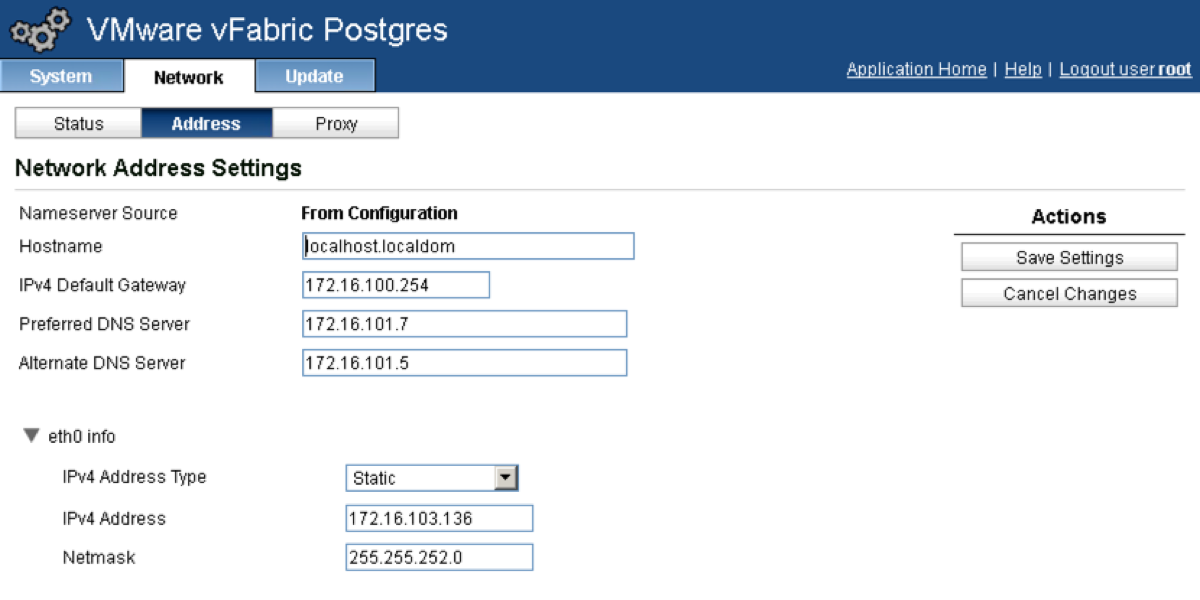
You may have noticed during deployment that we weren’t prompted for a hostname. Let’s configure that now. Navigate to Network > Address. In the hostname field, enter the FQDN of your VA and then click “Save Settings”.
-
Once you’ve verified that the remainder of your network settings are correct, go ahead and logout of the appliance.
-
Navigate to https://fqdn.of.your.vpostgres.appliance:8443 and as user postgres, enter the password you defined during the appliance deployment then click “Connect”.

- Click on Databases and then hit the “Enter SQL” button in the top right corner of the screen.

- Enter the following commands to create your DB user and DB:
CREATE USER username WITH NOCREATEDB NOCREATEROLE NOCREATEUSER INHERIT LOGIN ENCRYPTED password ‘password‘;
CREATE DATABASE_ dbname WITH OWNER username;_
Click “Execute”.
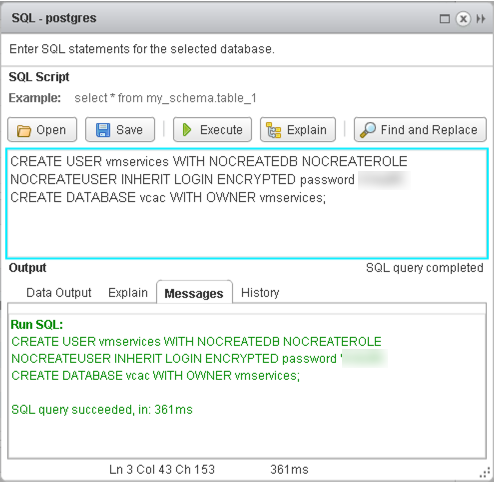
Note: The password must be enclosed with ‘ ‘
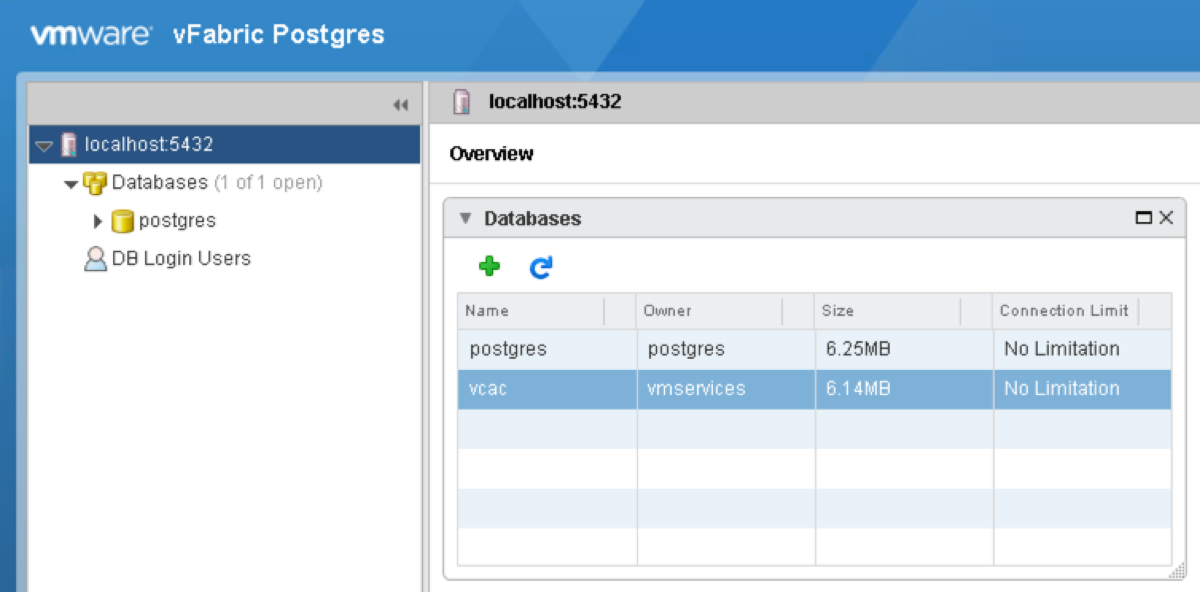
- Click on the DB Login Users to validate that the user has been created – if you don’t see it then click the refresh icon. You can confirm the database has been created by clicking on the host and then clicking the refresh icon.
-
Click Disconnect to logout as the user postgres, and then log back in (still using the vpostgres user).
-
You should now see the newly created database in the list of databases. Change context to the vCAC database, and then click “Enter SQL” in the top right corner.

- Enter the following commands to configure the vCAC database:
CREATE EXTENSION “hstore”;
CREATE EXTENSION “uuid-ossp”;
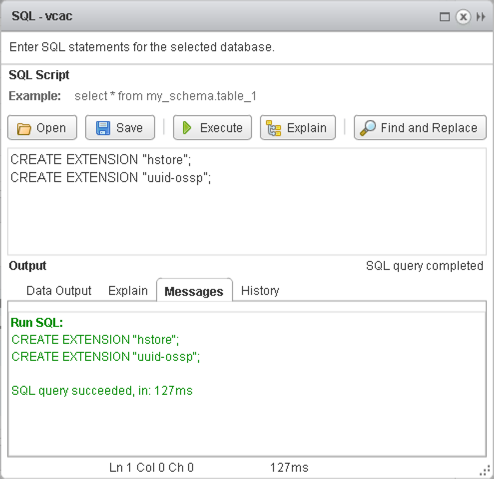
With that, we are ready to go point our vCAC 6.0 Appliance at the new database.
vCAC 6.0 Virtual Appliance Configuration
-
Login to your vCAC Appliance by navigating to https://fqdn.of.your.vcac.appliance:5480. Enter your username and password.
-
Navigate to vCAC Settings > Database
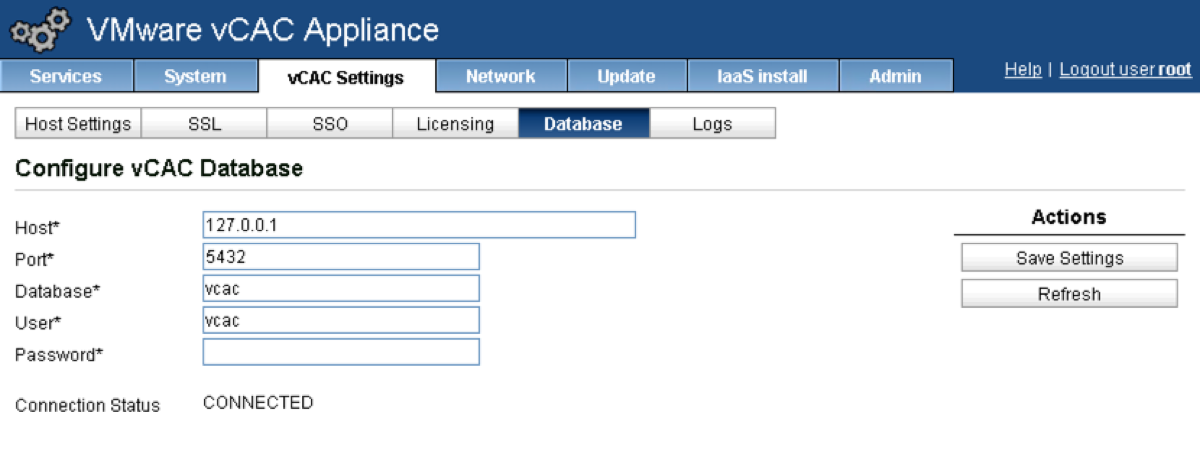
- Enter your vPostgres FQDN and leave the port at 5432.Add your database name and the user/password combo you created in the previous steps and click “Save Settings”.

- If you’ve done everything correctly you’ll get the big splash of green that you’re now familiar with.

- Pat yourself on the back, or crack open a cold one to celebrate. You’ve just configured vCAC to use an external vPostgres database.
