With the release of vCAC 6. 1(or rather vRealize Automation – that still takes some getting used to), the API which was in beta and a real pain to interact with in 6.0 has been made publicly available.
In order to interact with vRA 6.1, you first need to authenticate. Once you’ve authenticated and received your token, you then need to “stamp” every request with that token or your requests will be rejected. Examples of this will be provided with the examples in future posts.
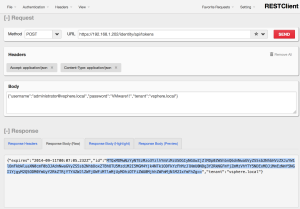
Example 1.1 – Requesting a Token
Headers:
Content-Type: application/json
Accept: application/json
Request:
POST https://
Request Body:
{
"username":"administrator@vsphere.local",
"password":"VMware1!",
"tenant":"vsphere.local"
}
Note: The values associated here are examples, insert the appropriate values for your environment.
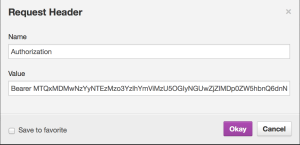
If you are interacting with the API via RESTClient (or a similar plugin) you can add an additional header value of “Authorization: Bearer
If you prefer Python, then take a look at the following.
Example 1.2 – Requesting a Token with Python
from __future__ import unicode_literals
import requests, json

vcac_hostname = 'vcac.lab.local'
sa = 'administrator@vsphere.local’
sa_password= 'VMware1!'
default_tenant = 'vsphere.local'
headers = {'Content-Type' : 'application/json', 'Accept' : 'application/json’}
sa_auth_headers = {'Content-Type' : 'application/json', 'Accept' : 'application/json', 'Authorization': sa_token}

def token_for_username(sa):
    url = 'https://' + vcac_hostname + '/identity/api/tokens'
    data = {"username": sa,"password": sa_password,"tenant": default_tenant}
    req = requests.post(url = url, data = json.dumps(data), headers = headers, verify = False)
    commit_data = req.json()
    sa_token = 'Bearer ' + commit_data[u'id']
    if r.status_code != 200:
        print "Authentication Failed for " + sa + " with error text " + r.text
    else:
        print "Authentication Suceeded for " + sa + "."
        return sa_token
That’s it for authentication – short and sweet. Next up we’ll look at some Tenant creation and configuration examples.


