Blueprints are the workhouse of Cloud Assembly, and the main workspace when it comes to authoring blueprints is the canvas. In this post we will take a look at some of the information you need to know in order to get started with creating your first blueprint.
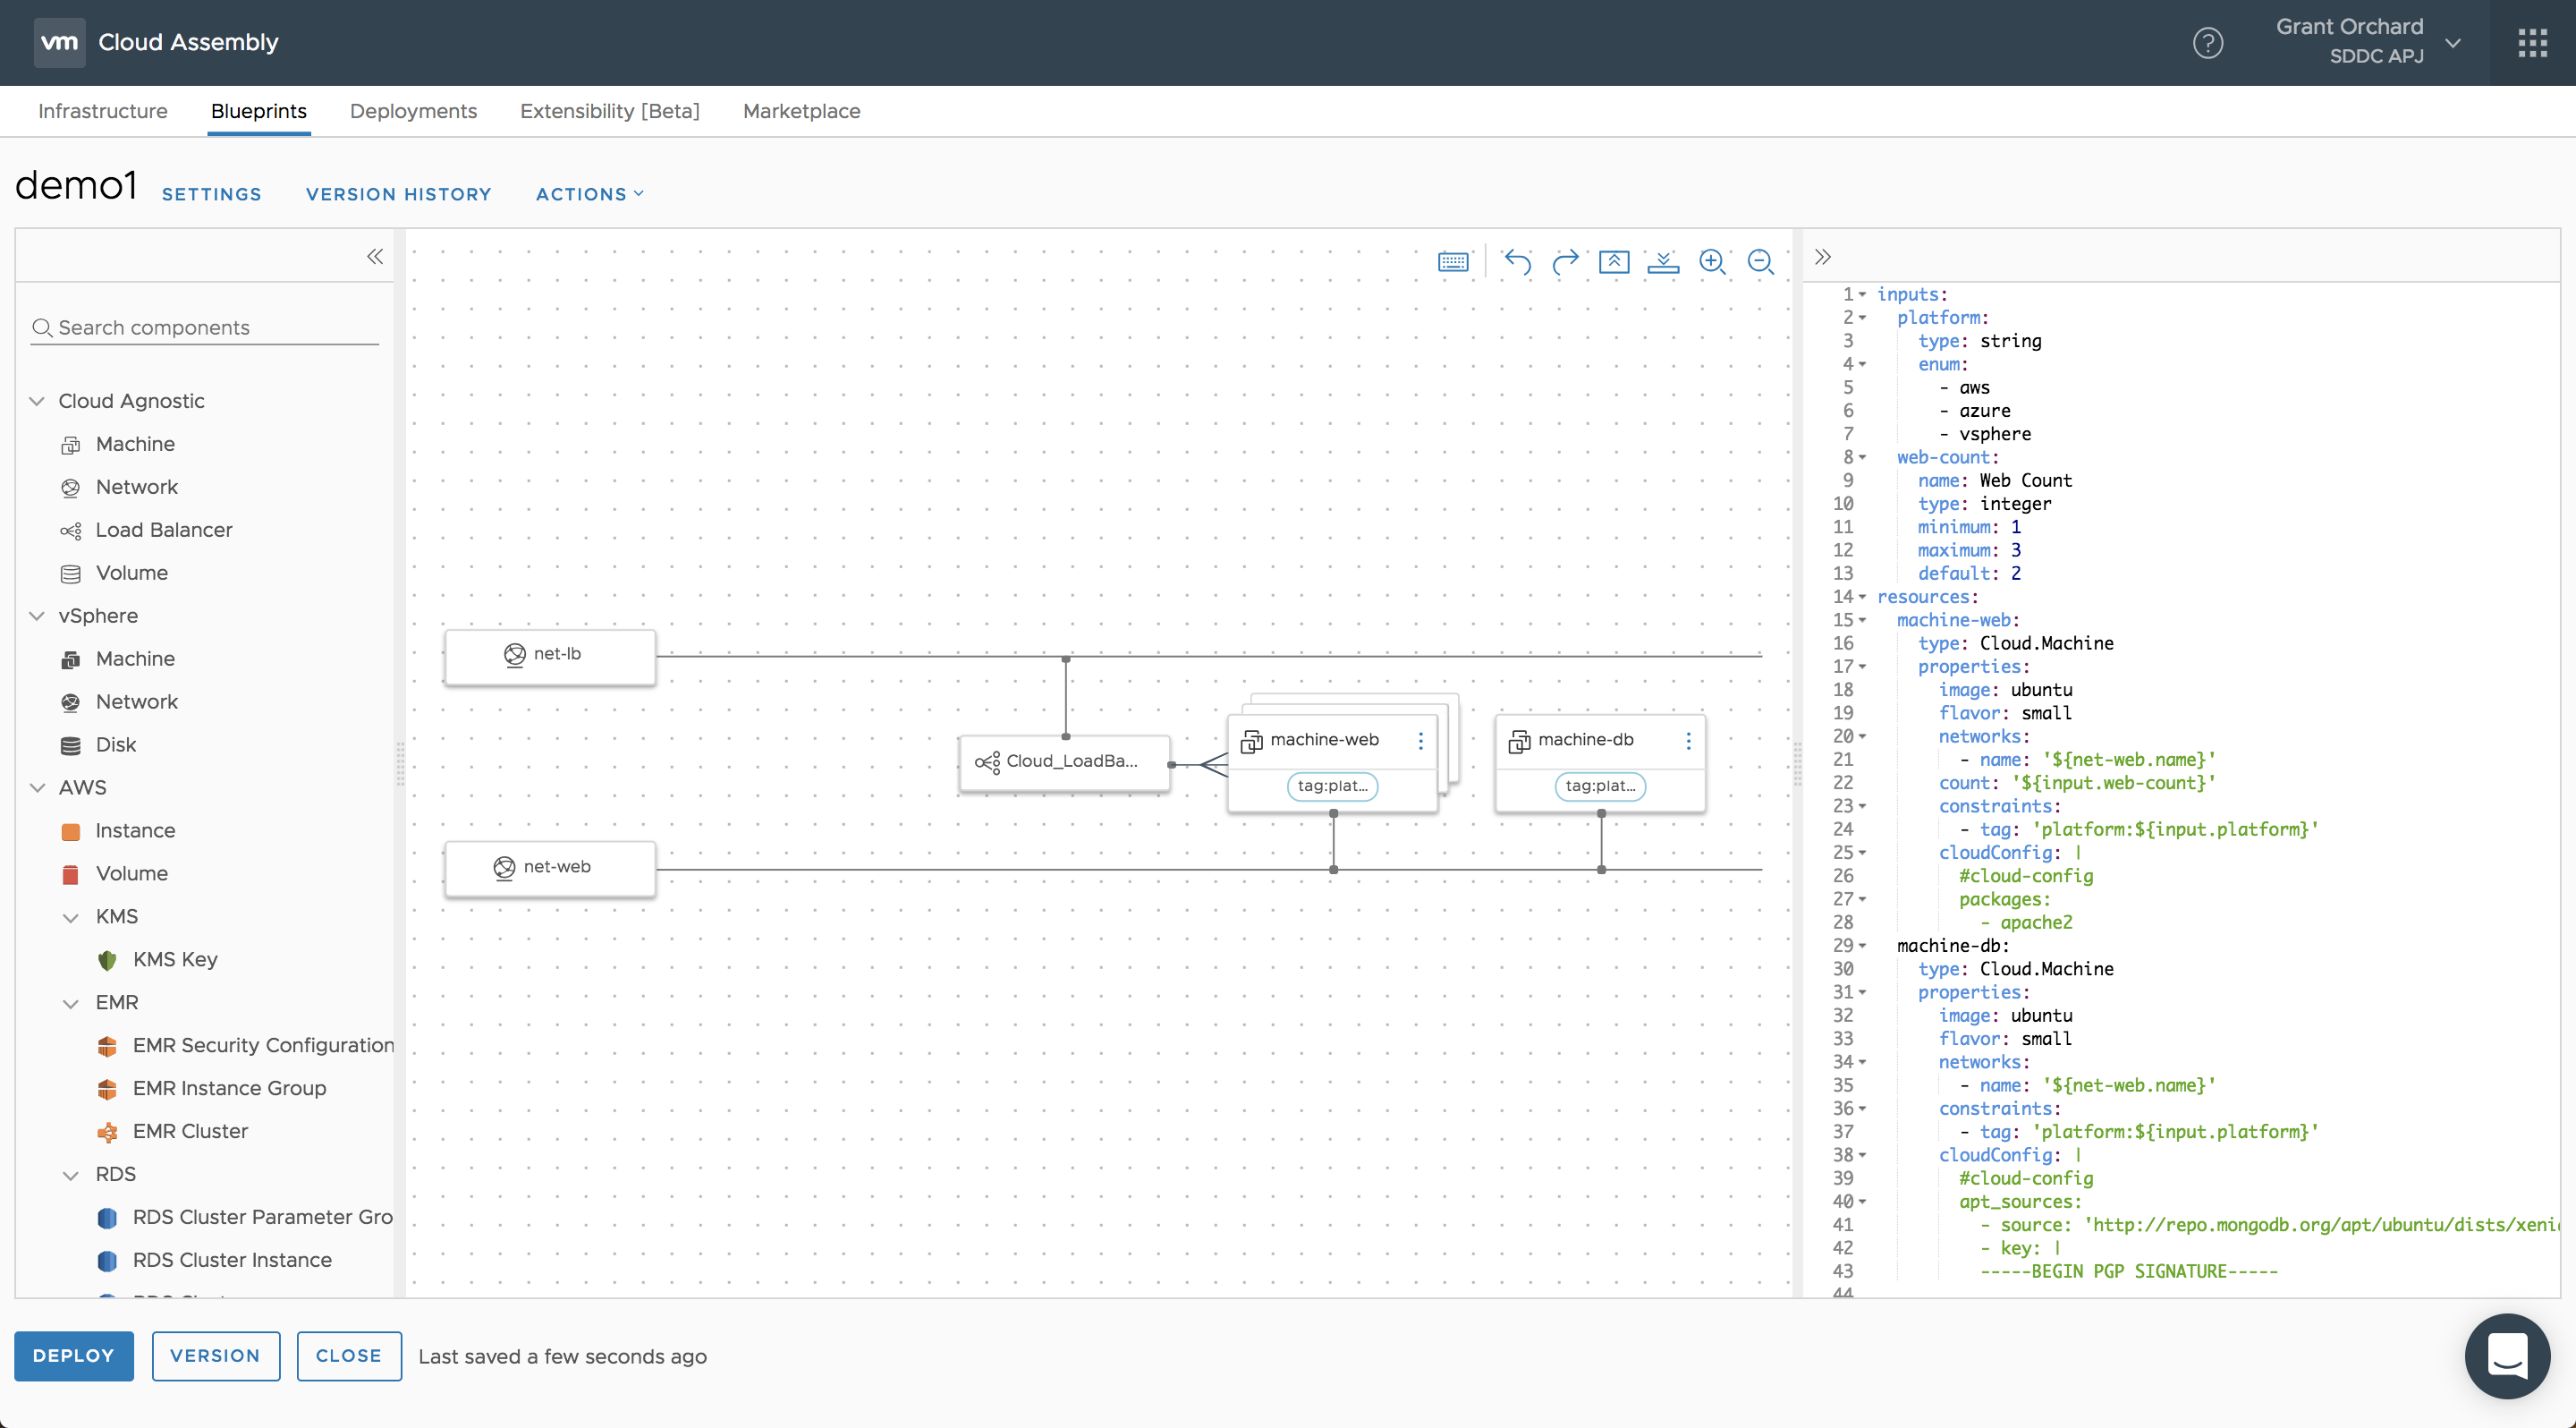
The design canvas is split up into three main sections, the components panel on the left, the canvas itself and the yaml panel on the right.
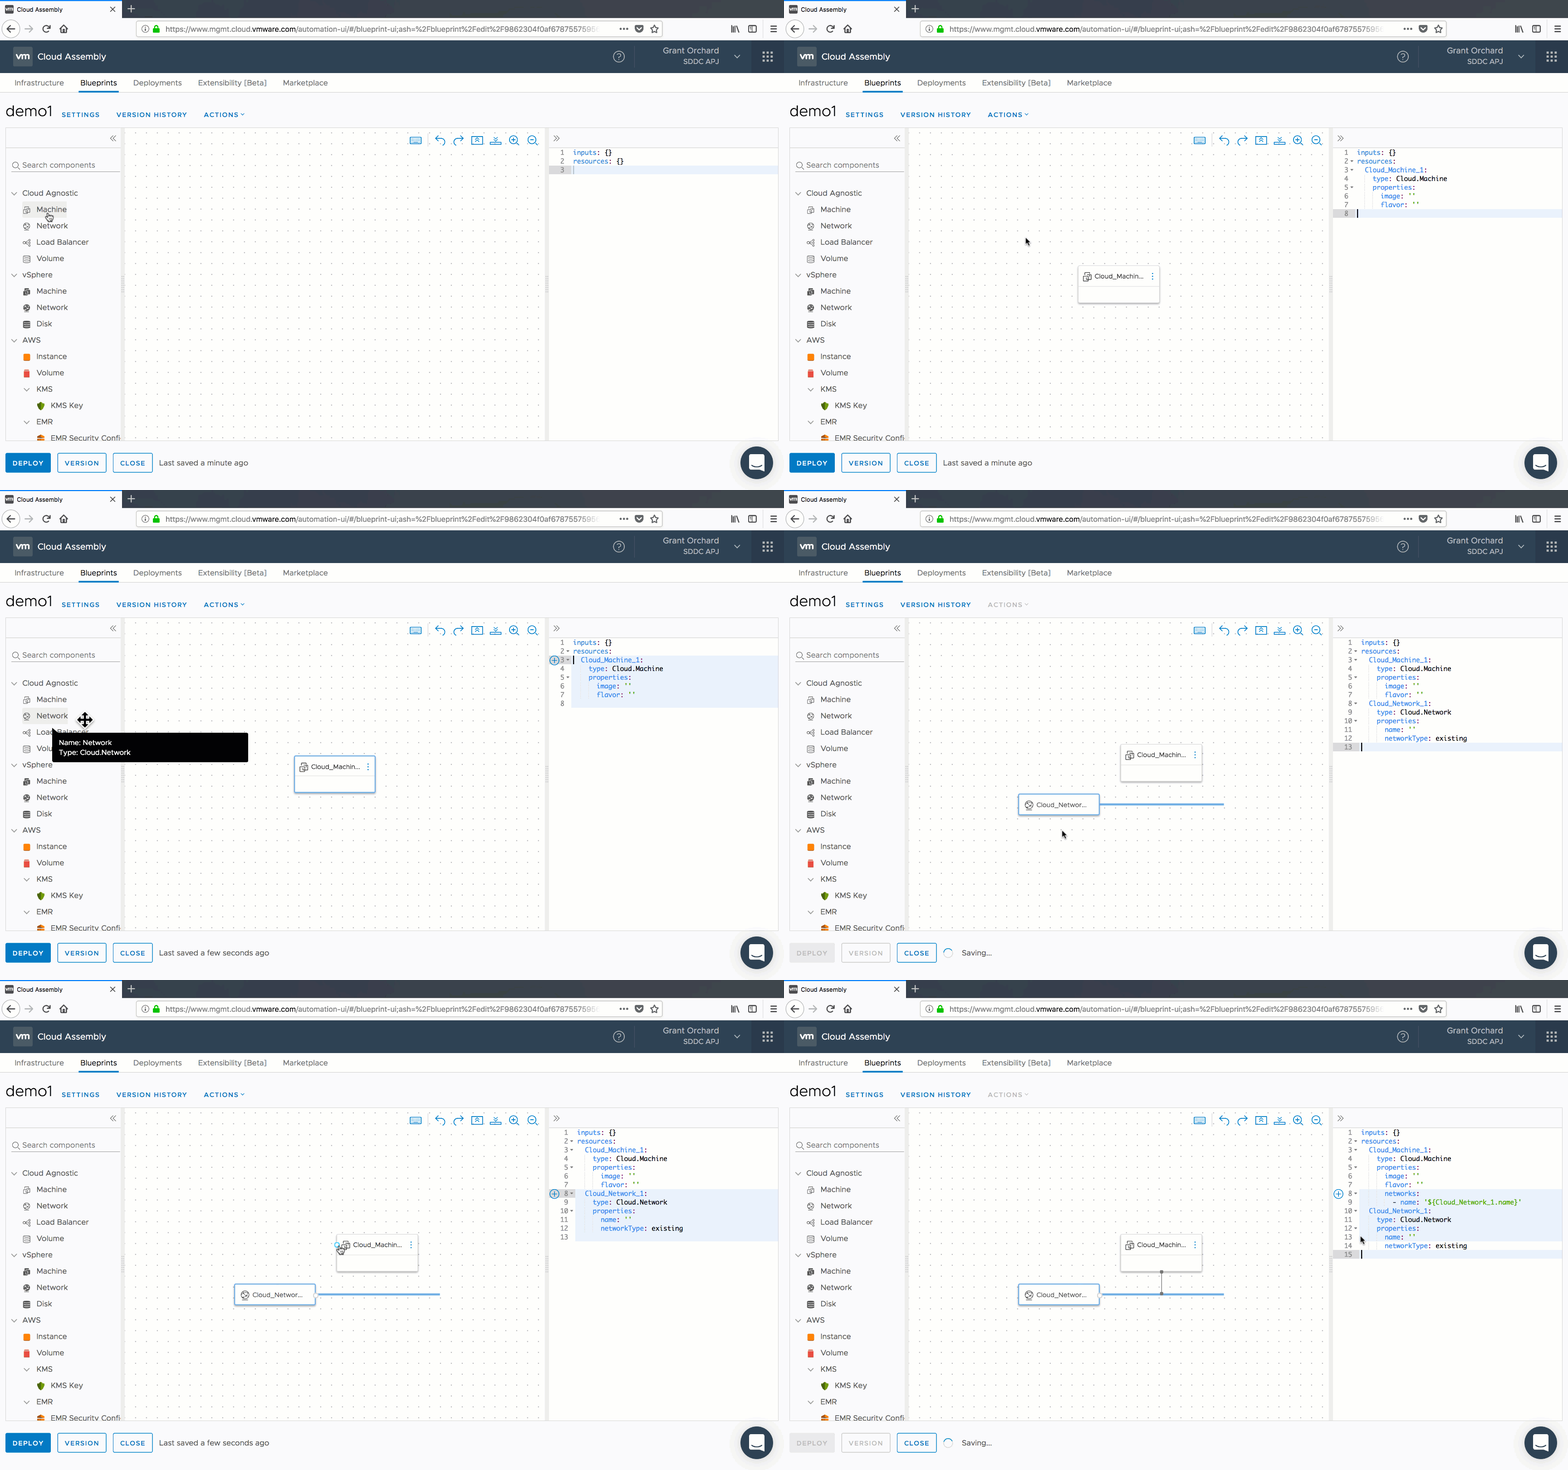
Getting started is quite intuitive. You simply drag components from the left panel onto the canvas, which results in automatic generation of yaml in the right panel. Conversely, you could paste a yaml definition into the right panel, and have the topology auto-generate.
Relationships between components, such as a dependency, a relationship between a machine and a network, or load balancer pool members as shown in the image above are created by dragging a ‘hot spot’ from one object to another. Once your yaml description is where you want it to be, then you can start to place requests with it, via the UI, CLI, API, or from Code Stream. As mentioned in the previous post, you can choose to work outside of Code Assembly to create a blueprint, and then pass your IaC definition back to Cloud Assembly via CLI, API, or have Code Stream pick it up from a repository and request it. However, working with the canvas rather than directly in an IDE has a few benefits.
1. Auto-discovery of Blueprint Values
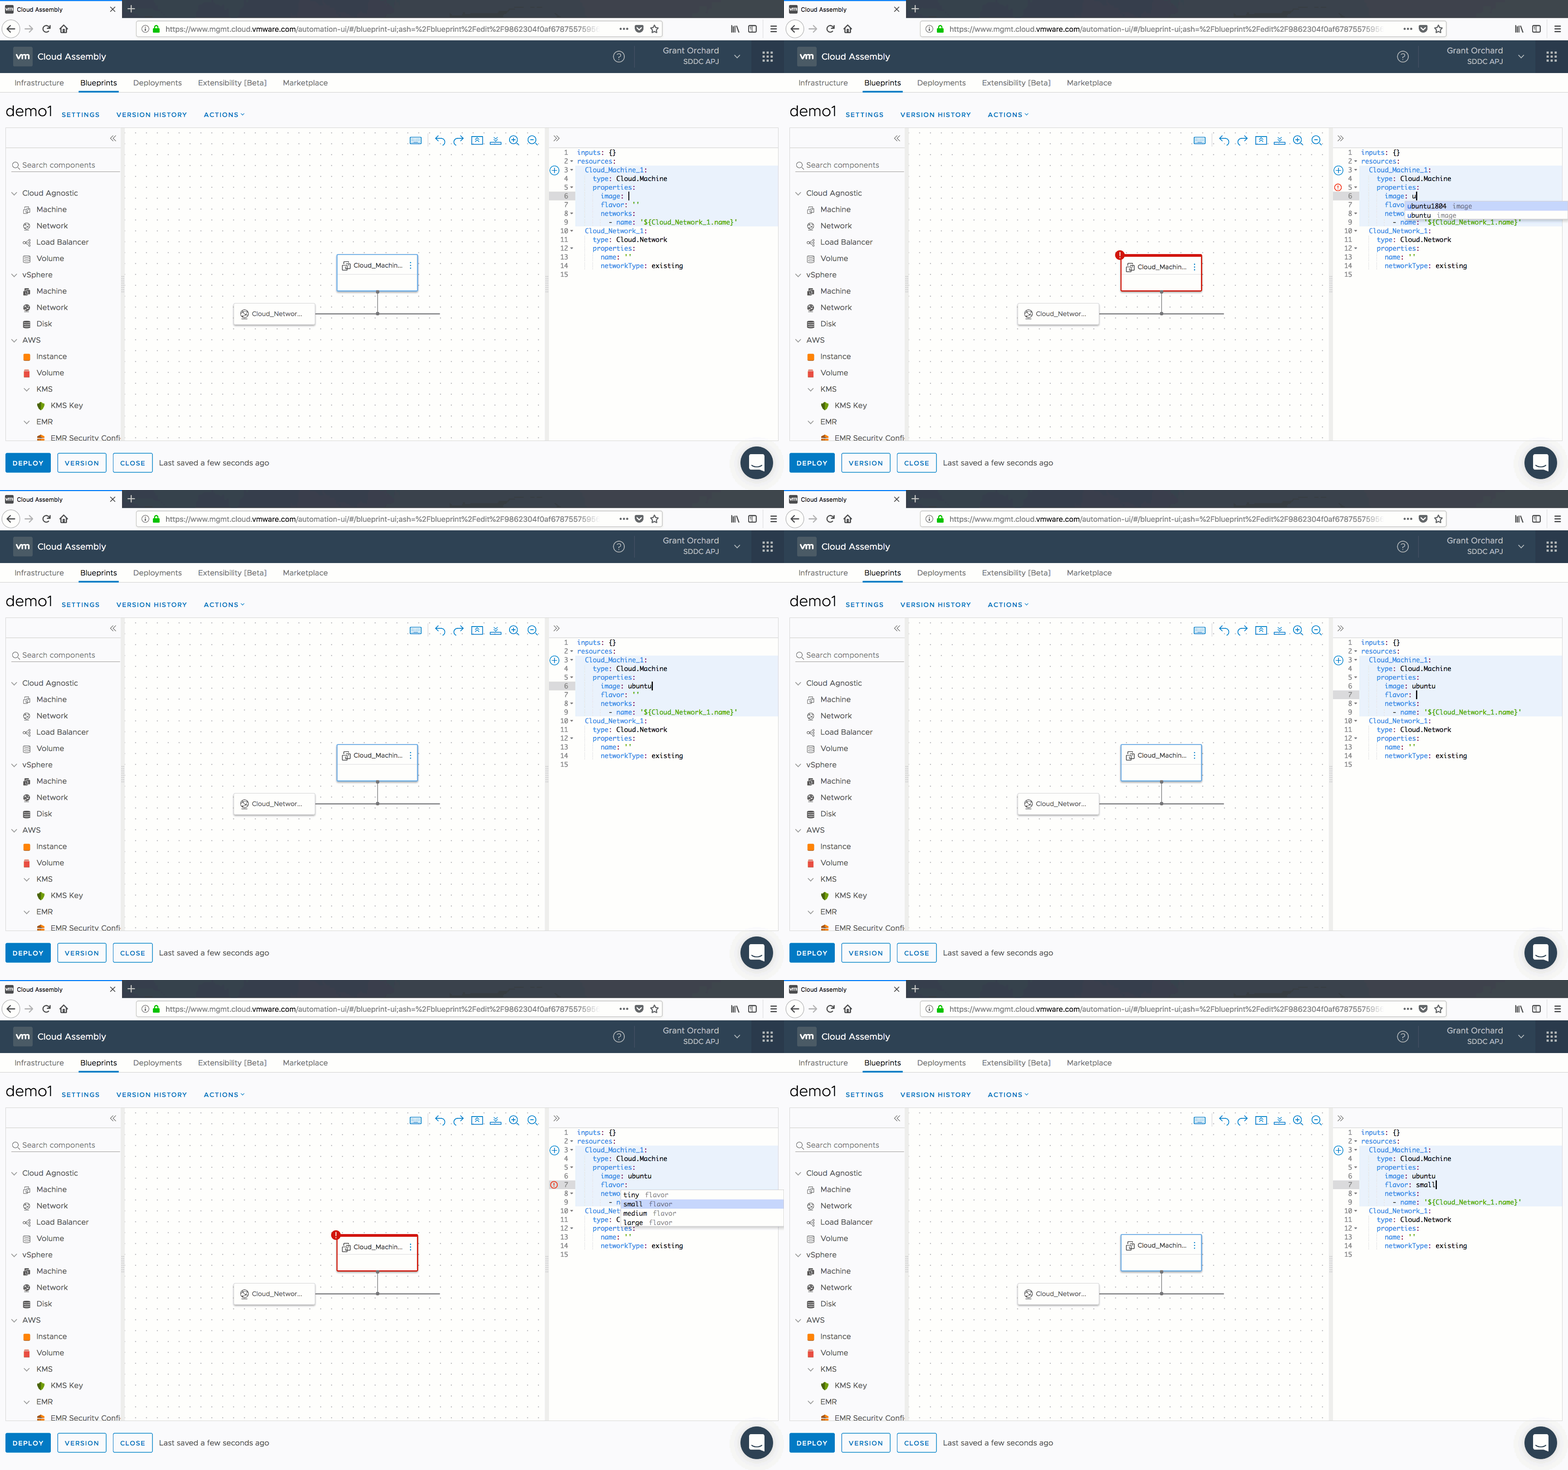
Imagine that you are creating a blueprint, and have no idea what arbitrary values the operations team have used for image names. Will it be Star Wars characters, Disney princesses, or Aussie marsupials?
By operating within the canvas, you gain the benefit of intellisense (or type-ahead) to help you identify values for both the available Flavors and Images configured in the system.
2. Additional Schema Helpers
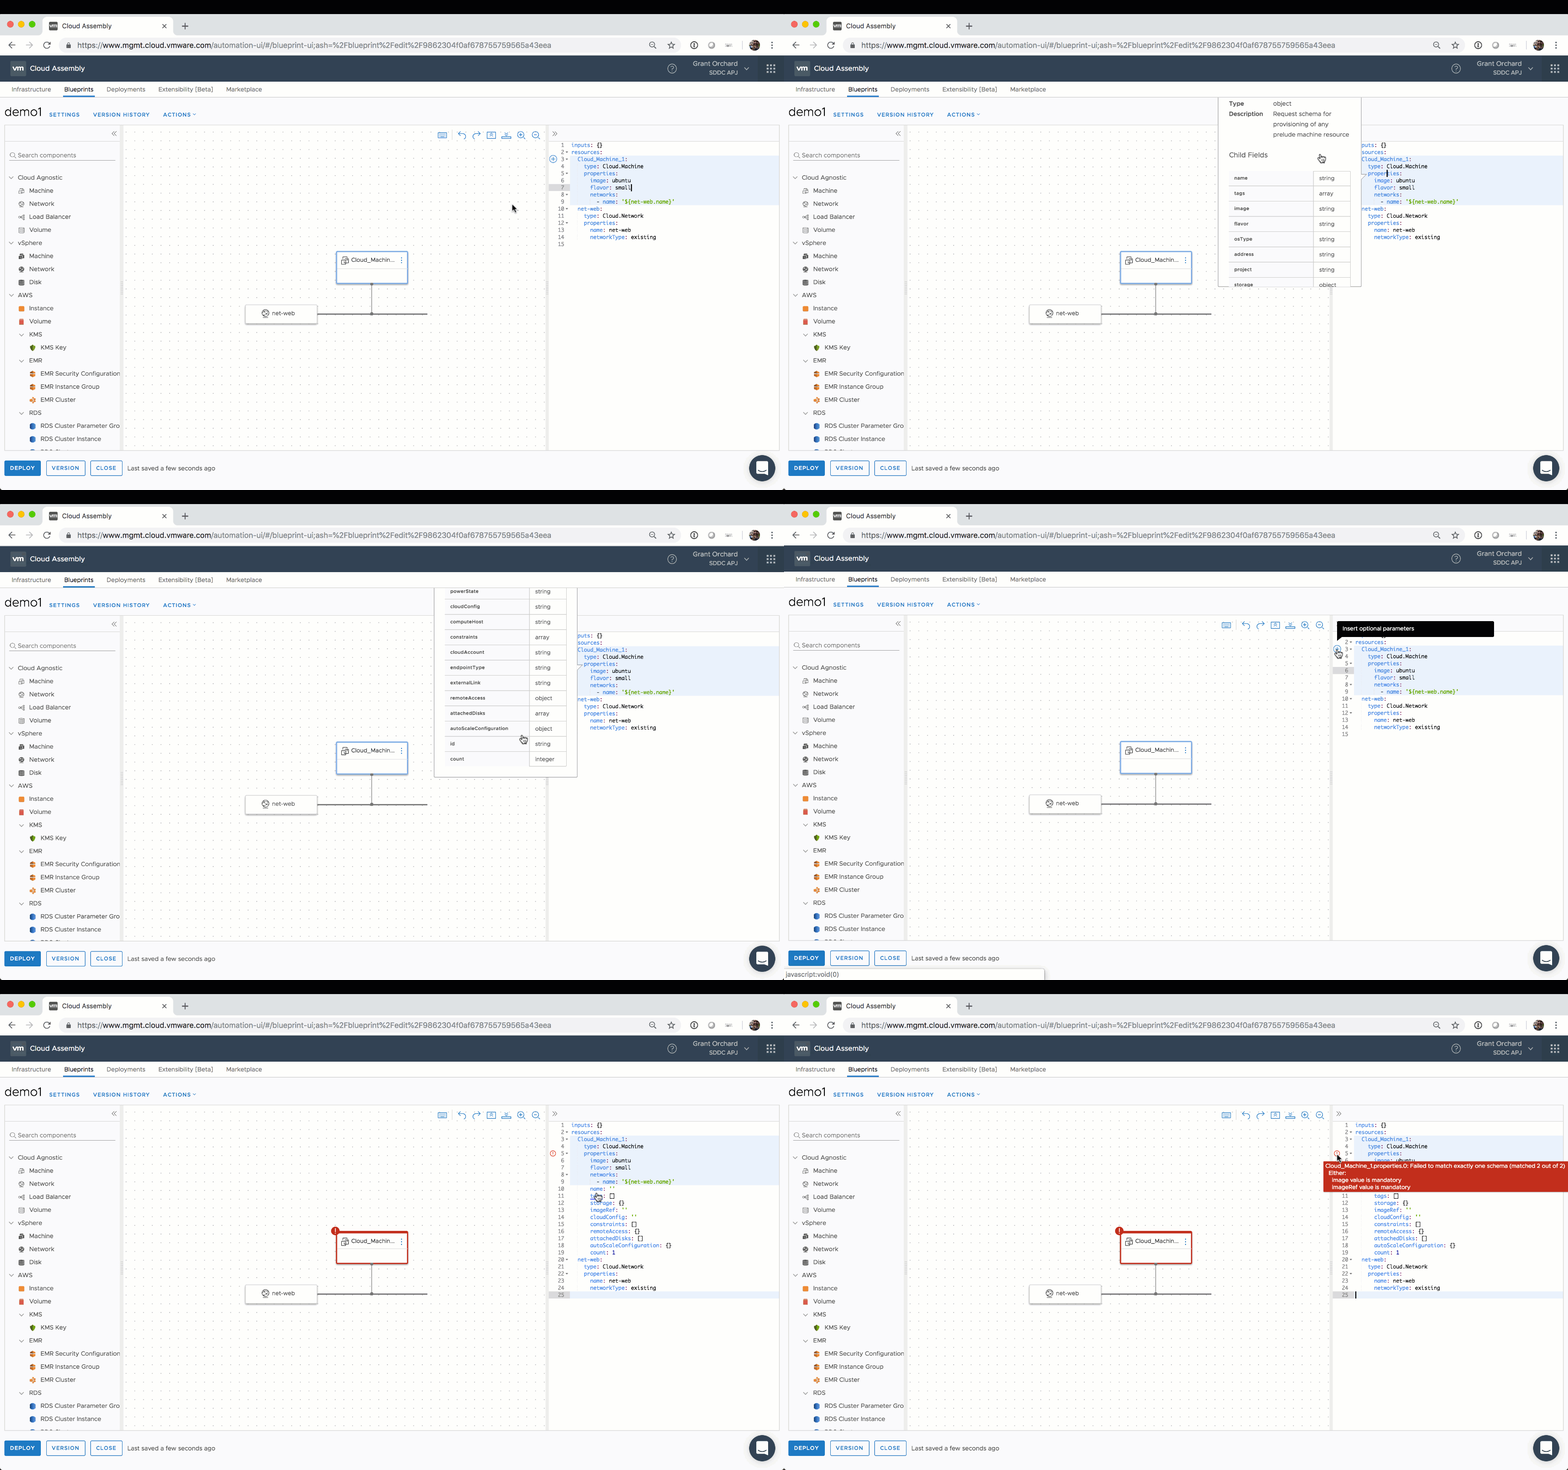
Apart from the build out of mandatory values, the canvas provides further assistance when it comes to understanding the schema.
Objects in the schema can be selected to discover child objects, and optional parameters can all be added with the simple click of a button. As you would hope, linting is also provided along with validation for conflicting parameters, and recommendations on resolving them.
As you can see, the canvas brings some really nice user experience to the process of developing your IaC definitions. Now that you have a handle on the basics, let’s start looking at some more advanced concepts. The next post will deal with blueprint versioning - something that it is critical to get right as you start working with more complext blueprints.
| This post is part of a series. |
|---|
| Part 1 - Introducing VMware Cloud Automation Services |
| Part 2 - This Article |
| Part 3 - Blueprint Versioning in Cloud Assembly |
| Part 4 - Getting Started with the Cloud Automation Services API |
| Part 5 - Working with Blueprint Inputs |


