
In my previous post, we took a look at how you could use cloud-init to provide a consistent workflow for image initialisation across both public and private cloud. The simple example passed a set of hardcoded values into a virtual machine running on vSphere, which isn’t reflective of the operations that you would need to perform in the real world. In this blog post, we are going to get a little closer to a real world scenario, and look at how you can use the Terraform template_file resource to render variables and conditionally include stanzas within the cloud-init useradata and metadata files.
The Code
Before we get started, you can follow along with the code in my repo.
In comparison to the previous example, I have added in a config.tf file that we will use to handle the file rendering. Splitting this out into a dedicated file is not a requirement, I just find it easier to break my Terraform code out functionally, especially when explaining what I have written to other people. There is also code in the outputs.tf file now, to make it easier to check whether or not our files are rendering as expected.
Variable Interpolation
First up, let’s take a look at substituting variables into our userdata file.
A quick glance at config.tf reveals the following block:
data template_file "userdata" {
  template = file("${path.module}/templates/userdata.yaml")

  vars = {
    username           = var.username
    ssh_public_key     = file(var.ssh_public_key)
    packages           = jsonencode(var.packages)
  }
}
Let’s break down what this resource is made up of.
template: The location of the template file that we want to render.
vars: These are the key/value pairs that we want to interpolate during the rendering process.
One useful thing to point out above is the use of jsonencode to take hcl types and present them in the appropriate format for cloud-init to parse. Encoding this value allows us to pass through a list, where under normal circumstances the template_file resource would only support strings.
You may wonder why we don’t use yamlencode here, since we are working with YAML files. This is because YAML is whitespace sensitive, which can’t be handled easily. YAML also supports some simple JSON constructs, such as lists of strings which is exactly what we want to present here.
Next up, let’s review userdata.yaml in the templates directory.
#cloud-config
users:
  - name: ${username}
    ssh-authorized-keys:
      - ${ssh_public_key}
    sudo: ['ALL=(ALL) NOPASSWD:ALL']
    groups: sudo
    shell: /bin/bash

packages: ${packages}
You can identify where our variables will be written via the interpolation syntax of ${value}.
So far, so good! Let’s take things up a notch.
Conditional Rendering
All of these pre-canned configuration files are great, but let’s pause for a moment and think about the real world. A simple but common example I was asked about by Anthony Spiteri was how you could go about handling DHCP vs static IP assignment without needing two separate sets of Terraform code.
Wouldn’t it be great if we could use some kind of condition to toggle the inclusion of certain code?
Open up metadata.yaml in the templates directory and let’s look at how we can do just that.
local-hostname: ${hostname}
instance-id: ${hostname}
network:
  version: 2
  ethernets:
    ens192:
      %{ if dhcp == "true" }dhcp4: true
      %{ else }addresses:
        - ${ip_address}/${netmask}
      gateway4: ${gateway}
      nameservers:
        addresses: ${nameservers}
      %{ endif }
The important pieces to look at here are the %{ conditions }. What are we saying here? If the variable “dhcp” is equal to true, then include the dhcp4: true block. Otherwise, include the subsequent code to set the static IP addressing. Neat right?
Browse back to the config.tf file and take a look at the template_file.metadata resource.
data template_file "metadata" {
  template = file("${path.module}/templates/metadata.yaml")
  vars = {
    dhcp        = var.dhcp
    hostname    = var.hostname_prefix
    ip_address  = var.ip_address
    netmask     = var.netmask
    nameservers = jsonencode(var.nameservers)
    gateway     = var.gateway
  }
}
You will note that the first variable it wants to pass through is var.dhcp. This value is set in your terraform.tfvars file.
An important thing to be aware of is that when you reference variables, they can’t have null values. So that we can have DRY (don’t repeat yourself) code and leave all of the vars in place regardless of whether we use DHCP or static addressing, we set blank default values for all of these variables in the variables.tf file, a couple of example of this are below.
variable gateway {
  type    = string
  default = ""
}

variable nameservers {
  type    = list
  default = []
}
Validating your code
A trick I have found useful when working with the template_file data source and wanting to make sure that my variables and formatting are correct, is to start only with my config.tf file, and my templates. I create an outputs.tf file and then perform my terraform apply and check that the output is rendering the way I want it to. Once it is, I then add in other resources such as machines.
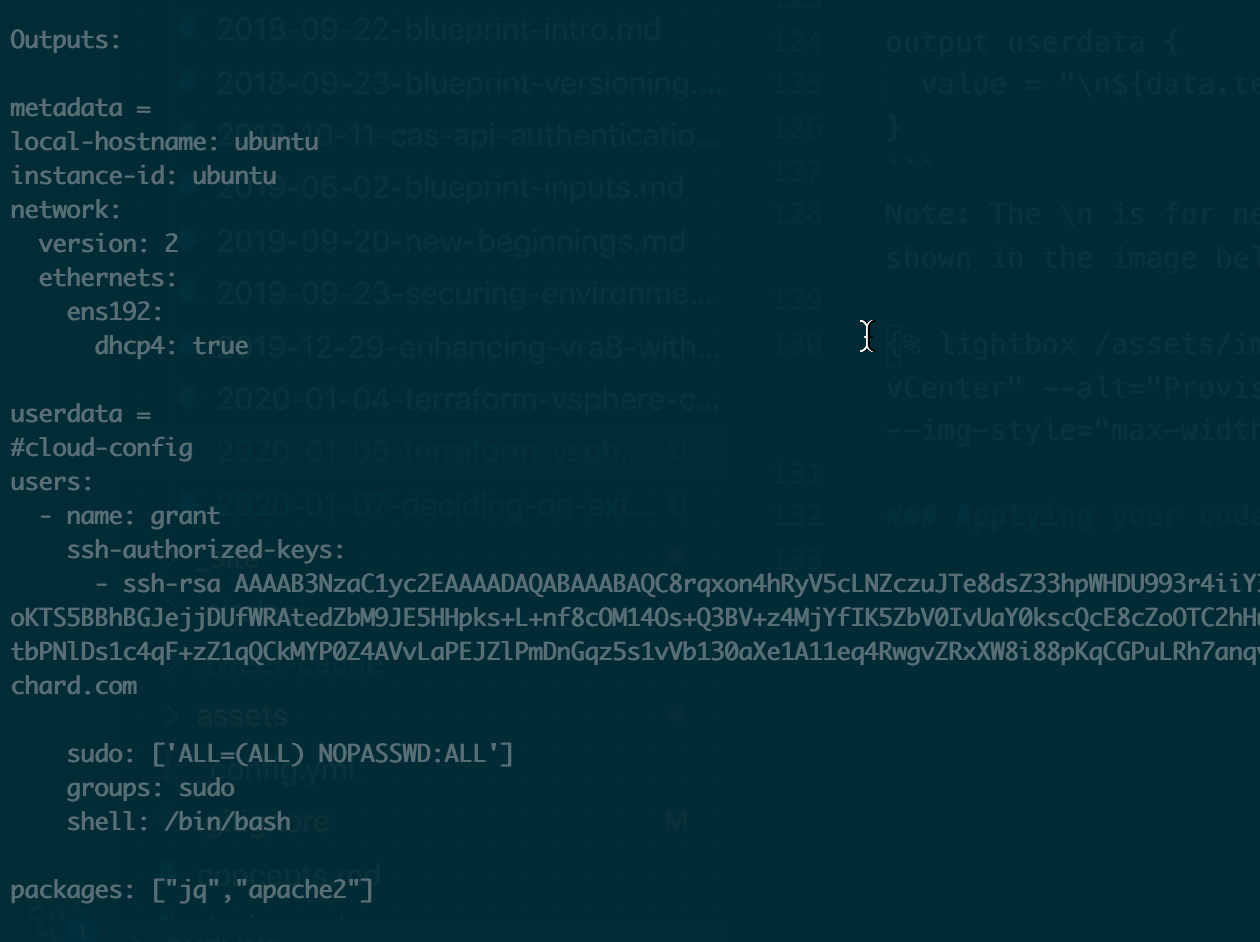
output metadata {
  value = "\n${data.template_file.metadata.rendered}"
}

output userdata {
  value = "\n${data.template_file.userdata.rendered}"
}
Note: The \n is for newline, and allows us to see the value of the output starting on a new line, as shown in the image below.
Applying your code
The terraform.tfvars.example provides you with a starting point for the variables that you will need to set in your own environment. Otherwise, you can go ahead and set your *dhcp value to static or dynamic, run your terraform plan and terraform apply as you would normally and away you go.
Conclusion
Variables can be used to render dynamic fields, and even conditionally include stanzas or other file contents. Taking advantage of this gives you much more code reuse, and in the next blog post we will take a look at combining what we have shown in the last two posts to start deploying Hashicorp products on vSphere.