
In the previous post we registered AppD to the vCAC Component Registry. In effect, this makes vCAC aware of AppD, but it doesn’t quite make AppD aware of vCAC.
First of all, you need to ensure that you’re working within the appropriate Business Group. It would be rather annoying to get this entire process done and then discover that you couldn’t utilise it because you’d done all of the required steps against the wrong Business Group wouldn’t it? Of course, I wouldn’t know anything about that…..
[two_thirds]Click the dropdown and select Cloud Providers, and then click Create a Cloud Provider.[/two_thirds][one_third_last]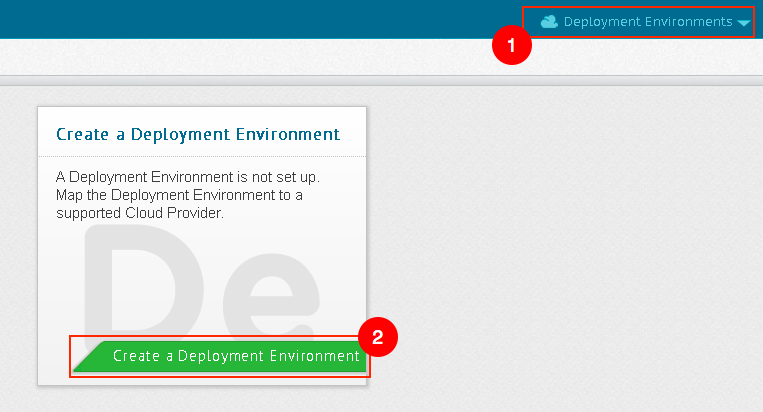 [/one_third_last]
[bra_divider height=’40’]
[two_thirds]Enter something descriptive in the Name and Description fields, then select vCAC 6.0 from the Cloud Provider Type dropdown. The URL will autopopulate (assuming that you followed the steps in the previous post successfully). Provide an account which will be used for authentication with vCAC and then click Validate Connection. The “Bussiness Group” (sic) will be auto populated for you based on the context selected back at Step 1.
Click on the blue plus symbol to import a few templates.[/two_thirds][one_third_last]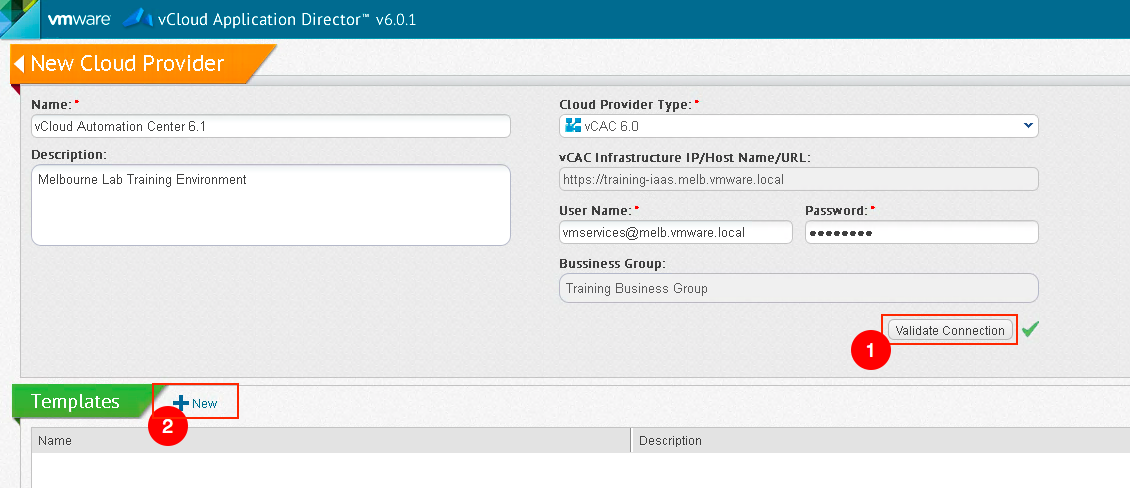 [/one_third_last]
[bra_divider height=’40’]
[two_thirds]Somewhat interestingly, these “Templates” actually map back to Blueprints. I’m making a specific distinction here between Catalog Items and Blueprints. AppD pulls back all available Blueprints (published or not). Select the ones that you want to use and click OK, then head to the top right corner and click save.
That completes the Cloud Provider configuration. The next step is to configure the Deployment Environment.[/two_thirds][one_third_last]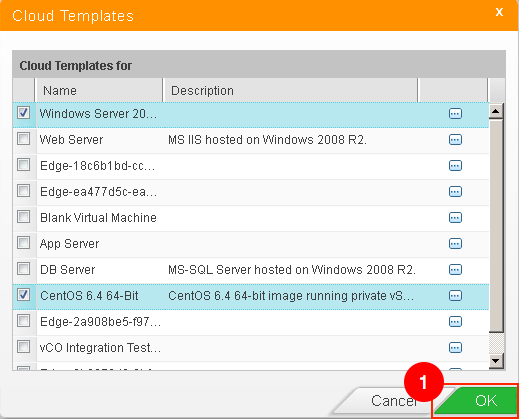 [/one_third_last]
[bra_divider height=’40’]
[two_thirds]Back to our Navigation drop down, and select Deployment Environments.[/two_thirds][one_third_last][/one_third_last]
[bra_divider height=’40’]
[two_thirds]Again, fill out the Name and Description fields, and select the Cloud Provider from the dropdown list.
You can read a bit about Reservation Policies here – in this case, you can either leave the field blank or you can select a subset of your available infrastructure based on it’s capabilities or function (think security, performance etc). A small segue for a moment – you’ll note that using Reservation Policies, you could create a Deployment Environment for Dev, Test, Production and so on. I’ll tackle some of the benefits of doing that in another post – it’s more useful when you have a bit of context as to how AppD behaves.
I’ll delve into Instances a bit later on – at this point we don’t need to worry about them. Click Save up in the top right hand corner.[/two_thirds][one_third_last] [/one_third_last]
[bra_divider height=’40’]
With that, you’ve created a Deployment Environment. The next post will cover off the mapping Logical Templates, and template preparation with guest agents.